


 Reply With Quote
Thanks tetrakid. Ya, that is so lucky to leave near by the series of LFS like Clementi or Serangoon. And I think our pocket is always having a big hole. Lol!Originally Posted by tetrakid

Sent from my iPhone using Tapatalk


Great!Now you can do shopping for all the other items!
Thanks tetrakid. Ya, that is so lucky to leave near by the series of LFS like Clementi or Serangoon. And I think our pocket is always having a big hole. Lol!
Sent from my iPhone using Tapatalk
Hi aza,
It sounds good. Do you mind sharing a picture of your setup? Btw, as mentioned, I try to open the filter not by pulling directly from the top of the handle but from the sides. So the force will be closer to the hinges and that side parts are more firm compares to the flimsy top handle.
Sent from my iPhone using Tapatalk
Sure. Super messy haha. I run two parallel filters; one 2217, the other Ecco pro 300.
The prefilter for Ecco pro 300 is on the left with double taps so I don't really need to clean the main filter.
image.jpg
Thanks aza! Very creative! Thanks for the idea!
Sent from my iPhone using Tapatalk
I have worked out with the hardscape as per photos. Appreciate your comments on that so that I can improve it further before planting. Thank you.
Honestly, it is very tough decision to make everytime put in, take out. Lol. But it is really fun and enjoyable process!
Sent from my iPhone using Tapatalk

Ya, fish-keeping not only needs money but also a lot of our time. It 's not just a simple matter of feeding every day, but also a commitment to spend time in tank maintenance. It is really a full-time endeavour. There are many routine chores to be performed.
That is why many give up along the way and then always get back again after a few years of missing fish. Somehow people are interested in fish for life.
LIFE IS UNBEARABLE WITHOUT A FISH TANK!!!
 Baton courtesy.....service with a smile!


It might be a therapeutic thing to return to fish keeping after giving up earlier. However, mostly poor planning and anticipation is what drove hobbyist to give up in the first place. Not thinking ahead and ill prepared are usually the result when they arrived at a situation. Also, most folks have this idea that you only need a certain number of equipment to use for a certain sized tank but sometimes, extra equipment might just make things a bit easier for us in the long run. Having a mind that think out of the box helps too as you never know when a new tool or equipment that was created for something else can be used in the aquarium hobby. Sometimes, you need to bend the rules a bit to achieve your goal.
If you've learnt, teach, if you have, give.
Don't walk behind me as I might not lead, don't walk in front of me as I might not follow. Walk beside me, as my friend.
Mohamad Rohaizal is my name. If it's too hard, use BFG. I don't mind.
Treatment for Driftwood and Stones
Treatment for driftwood and stones/rocks takes time. So it would be better to prepare it in advance.
After getting the driftwood, the next day I soaked it in water so that tannin can be leeched out slowly. After 2 days, it can be seen tannin had been leeching out but not so much. So I decided to boil the driftwood so that the process of tannin leeching could be accelerated. Driftwood was boiled few hours and tannin was leeched out a lot as can be seen from the tea colour of the boiled water. It was boiled totally about 6-7 hours and after 3 times water change, water seemed much clearer and it might be ready for hard-scaping. Boiling driftwood also minimize or even eliminate the chance of unwanted snails or algae or any harmful parasites before arranging it in the aquarium.
My kid's bathtub was being used for drifwood soaking purpose :P
Water was clear at first
And it become brownish after 2 days but not so much
Boiling driftwood in the biggest pot that I have to accelerate
tannin leeching process and disinfect the woods.
After one hour, can see tannin being leeching out.
After 3 hours, I have some tasty Teh-O colour :P
After 2nd water change, now I have green tea colour.
And after all, leave it dry and cool off before using
For the stones or more correct are river pebbles, I soaked it in water for 2 days and before using I also pour the boiling water on it and soaked overnight in the pot. Interestingly, the pebbles absorb and keep the heat extremely well as the next day morning I took it out from the pot and still can feel water was very warm. No wonder in the old time, people use to heat the rock, wrap it in the blanket and use that to keep warm during winter time. With the same reason of boiling driftwood, with this disinfection method, I don't think any kind of harmful parasites could survive under 100 degree C hot water.
Stones were put in the pot and boiling water was poured in for disinfection.
It was left overnight there in the pot.After the treatment and disinfection, now the driftwood and stones are ready to use for hardscaping.
After disinfection, it was brought out to leave it dry and cool off.
I also measure the weight of all rocks about 10kg in total.
I have a quick question: Should I use super glue to attach Riccia Fluitans to driftwood? Or need to tight with thread or net? I have this ISTA glue on hand and would love to try but not sure if it will be attach well.
Sent from my iPhone using Tapatalk
My suggestion would be to tie it with fish lines. Reason 1) you will need quite a bit of glue to secure the riccia nicely. 2) with bigger amount of glue, you tend to see bigger patch of white stuff when it dries. 3) easily to reuse the wood with fish lines as you do not need to remove the harden glue in future. To me, glue is normally for very small patch or area.
Thanks for your advice.
I am also thinking of using the net to cover it but it looks kind of ugly at first.
Sent from my iPhone using Tapatalk
Finally, cabinet was ready to be collected. To save some bucks, I decided to do self-collect from the factory which is located at Premier@Kaki Bukit. Reaching the factory, I realized that even the company that I ordered from was AquaFishtank (Deco O), the sub-contractor who did the cabinet was CR Aquarium. That made me feel peace in mind since CR Aquarium has been in this line for very long and quite well-known for making fish tank and cabinet.
CR Aquarium Factory at Premier@Kaki Bukit The Boss from CR Aquarium is a very nice gentlemen. He arranged the transport to deliver the cabinet (and also me) back home with free of charge. I really appreciated that gesture. It was not about the money, but about the kindness.
Happy to see my cabinet had been done
(right side, second row)
The cabinet was brought back home just like that, safe and sound. Although the dark walnut colour is kind of lighter than my furniture's walnut colour but overall is fine. Great feeling to unwrap the new cabinet. Ya, I believe everybody would enjoy opening ceremony.
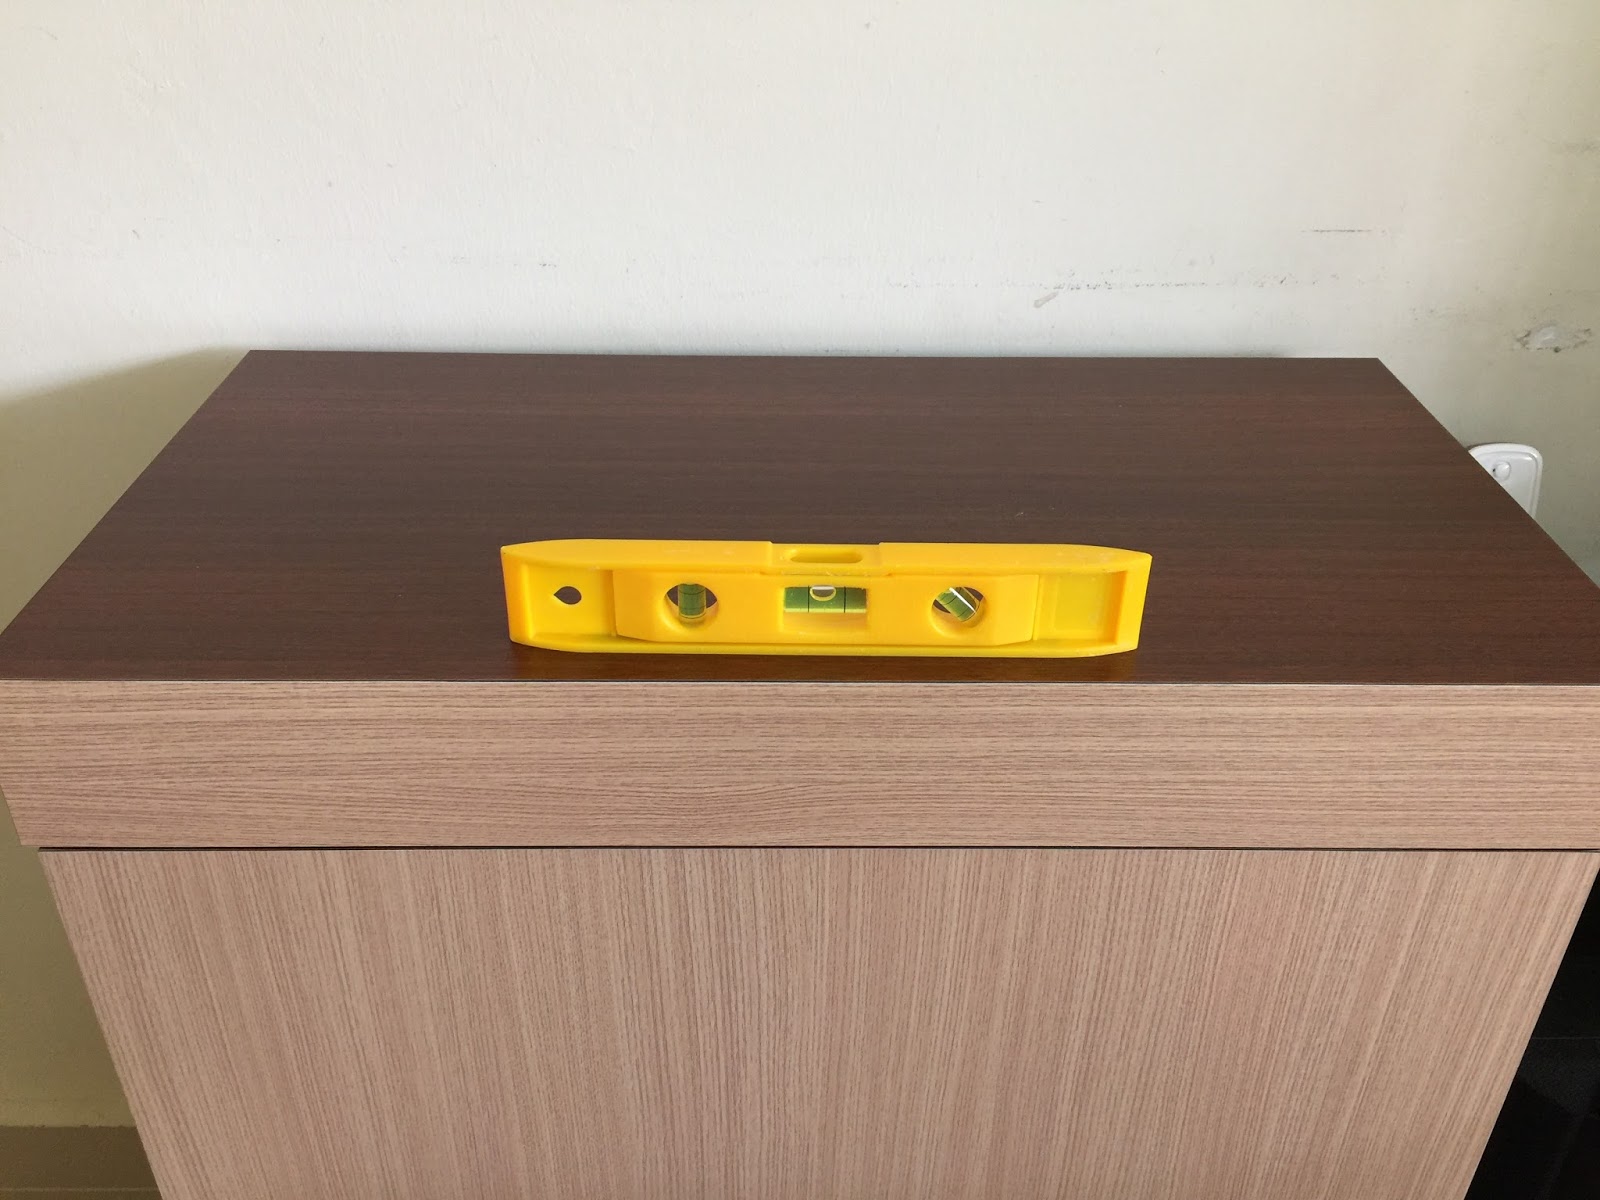
To make sure the cabinet is balance from side to side and from back to front, I needed to adjust a bit by using the self-adhesive foam pad attached to the cabinet feet. After that, a long spirit level was used to check whether cabinet is properly balance.
Unwrapping in progress...
Self-adhesive pads were used.
It was properly attached to the cabinet's feet
Spirit level was used to check from back to font It is very important to make sure that cabinet and fish tank is placed properly and leveled. It is extremely difficult to make any changes once the tank filled with water. Imbalance tank can cause crack or leakage in after tank being filled, that would be a nightmare!
And from side to side to make sure the cabinet is balance
Spirit level was checked once the tank in place Voilà! The tank is ready now on the cabinet. Some cleaning was done for the tank and cabinet before any hardscaping work start. I used glass cleaner solution to clean the outer tank and inner tank was cleaned by the damp cloth without any chemical.
Also remember to check the level at the side
This is the best location that I can get in the living room, although it is not so ideal since TVs and speakers are around. I hope the fishes would enjoy the music when they are here. :P
OK. It is ready for hardscape set up now.
Some barang barang that I bought from NA and also from neighborhood shops for the later stage.
Next chapter, hard-scape setup!
Shopping frenzy
Hard-scaping Setup
Finally, I could hands-on the hardscaping setup after many days preparation. To create the backbones of the aquarium, I have read and reviewed through many layouts and resources. It is really convenient to do research nowadays with tremendous resources from internet. Also, thanks to AquaticQuotient forum, I got many helpful advice from the experienced hobbyists. It makes the learning process much shorten and enjoyable.
I decided to choose triangle style for my first planted tank since I was so impressed by the work on "Sticks & Stones" layout from James Findley. This layout got sorted out after many trial on the available driftwood and stones that I have on hand. Process of hard-scape setup was described on the photos sequence below:-
I use this drain board to cover the tank bottom to prevent
direct contact of stones to glass surface, which may cause
crack due to point load. With this board, force would be
distributed more equally on the glass surface.
Two drain board were nicely fit my 2ft tank
After that, ADA Amazonia Aquasoil (Powder Type) was added with slope
upward to the right back corner. I also use post-it notes and marker to
draw the guiding lines which followed "rule of thirds" accordingly. The
front part was marked with 2.5cm for minimum soil depth required,
so that I would not keep it too thin.
Big piece of driftwood was put as the focal point of the aquarium.
Counter part is a smaller piece on the other side.
River pebbles were added that made me feel more balance.
From the top view, I tried to create more space for planting in later stage.
Plastic card case was used as substrate support in my layout.
Small pieces of plastic were used to support the substrate base
Substrate support was pegged into aquasoil and covered
later by another thin layer later on to make it invisible.I was quite happy with the final product and the process was really enjoyable. I also found out that sometimes the piece of driftwood or rocks that I like at the beginning might not be always suitable for my layout. So the more materials that you have, the better. More options, more choices. The next step is equipment setup.
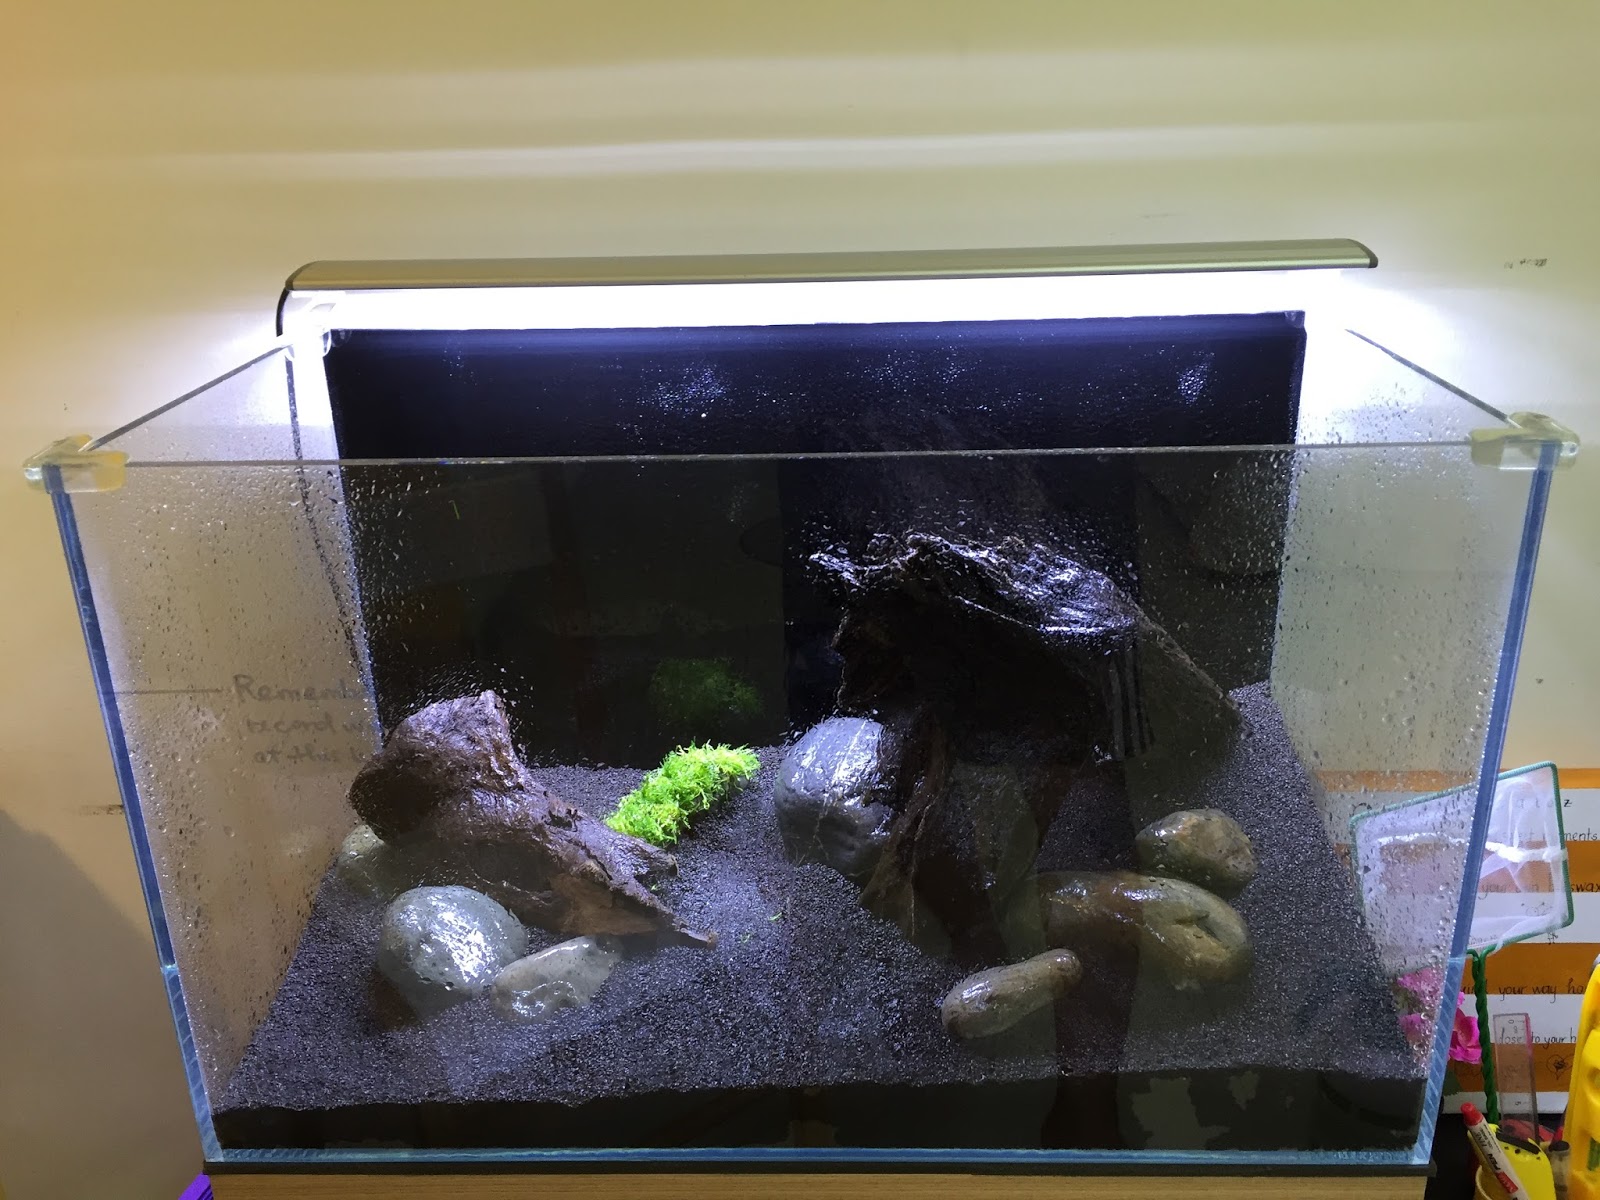
Finally, the hardscape setup was done
Equipment Setup for Aquarium
After hard-scaping work for aquarium done, next step was to install the equipment like CO2 supply system, canister filter and lighting for it. Since that was the first time I really hands-on this kind of "plumbing" work, it was quite nervous but also very excited process. I read the instruction manual carefully and also search "how-to" on youtube and internet to make sure the process were correctly followed.
CO2 system was kind of straightforward to install thanks to the useful video from EastOcean on youtube. The video really shows step-by-step of cranking up the CO2 system for a planted tank, it helped the newbie like me understood the process clearly. I, however did not use CO2 diffusers since I don't really like the "7-up" effects in the tank later. In order for CO2 to absorb more on the water, I used ISTA External CO2 Reactor instead. Furthermore, there would be no tiny bubbles flying around in the tank later on.
For canister filter, EHEIM Ecco Pro 300 has existing filter media and I decided to useEHEIM bioMech and EHEIM SUBSTRATpro for the first 2 trays of the filter. The last tray was Seachem Matrix. The media was rinsed under tap water until the water clear and was placed in the filter accordingly. I noticed each tray can store up to about 0.7L-0.8L of media material.
Media filter material was being cleaned up under tap water
EHEIM SUBSTRATpro
EHEIM bioMECH
Seachem Matrix Lighting and CO2 also needed to be linked up with the electrical timer plugs accordingly.
Since I did not use the filter right away, I just leave it outside until
canister needed to be used.
It took me quite long to finish the equipment setup work for this first time. Next time, it would be better since I have already known the process. End of the day, equipment is ready for the next step: planting!
Timer were ready!
Equipment were ready to be utilized
Next chapter, hard-scape setup!
Shopping frenzy
May I know where did you buy the dispenser for the fertilizer. Thank you
Hi Realcaster,
Since my cabinet is quite small, I would transfer the fertilizer to the smaller bottle to save the space and convenient for frequent dosage.
Moreover, it is also faster for dosing later if you already know the amount of "one squeeze" from the dispenser (for mine, it is about 1.2mL for each squeeze).
So, everytime just bring it out and squeeze.
Yeah, that is a good ideal.
i was actually thinking of mixing my regular dosage of Fertilzer in the correct ratio and have them poured into a single bottle it would make dispensing a lot easier. I am just worried about chemical reaction between various fertilizer. if the concoction method works, my life would be a lot easier.
anyone try this before?
Then you can buy those fertilizer which has many components like Seachem Flourish.
Sent from my iPhone using Tapatalk
Planting in Progress
The most important day finally came. Nerves of steel. No back down.
I purchased some 1-2 Grow! Tropica plants from Green Chapter and spent whole night setting up the tank. It took about 5-6 hours to finish all of this work since that was my first time hands-on. Hopefully, next time, if any, it would be faster.
The photos below describes my work process to set up the tank
Some of the plants were not in my initial planting scheme, however due to limited stock from GC, I chose alternate plants for replacement.
5 pots of 1-2 Grow! was bought for this initial stage, including:
2 x Eleocharis acicularis 'Mini' - Foreground
1 x Rotala 'Bonsai' - Midground
1x Heteranthera zosterifolia - Background
1 x Riccia fluitans- Moss on Rock
Tools and planting scheme were ready for the process
Riccia was attached to the rock at first by cotton thread.
I did not have any fishing line available so this is the temporary method.
I might need to tight it again if the cotton thread give way.
Water was spray on the surface of the soil gently so that the substrate
would not mess up and floating once water filled in.
Soil surface was damp and firm after water spraying
And it is ready for water filling process
Plastic bag / some floating material was introduced to cover the soil
and hardscape below. It would help to protect the hardscape/soil from
sudden movement when water being introduced.
Traditional way to introduce water in to the tank
Water was conditioned by Seachem Prime before being introduced to the tank.
Water was filling up slowly
And at this level, that was sufficient to start planting.
It can be seen there was no mess up on the soil and hardscape at all.
Plants was prepared ready for action
Pinsette made planting under water much easier
Planting is easier with shallow water fill in the tank.
 Posting Permissions


Bookmarks