Advertisements
Aquatic Avenue Banner Tropica Shop Banner Fishy Business Banner
Page 2 of 14 FirstFirst 12345612 ... LastLast
Results 21 to 40 of 269

Thread: Project sunken garden

  1. #21
    Join Date
    Jun 2006
    Location
    Jakarta, Indonesia
    Posts
    476
    Feedback Score
    0
    Country
    Indonesia
    Advertisements
    Fresh n Marine aQuarium Banner

    Advertise here

    Advertise here
    @XnSdVd,
    Yes, it is under construction at our old house along with general renovation. I'd love lots of ferns and creeping plants, but time will tell if they can thrife in there. I still need to learn the green thumb way to keep sensitive tropical plants.

    @avijitsen,
    Thanks. People's opinions also matter for me.

    @Harsh,
    Well.. the neighbouring american based forum. You know. But you can stick to this thread as I will update my work right here as well.

    @wks,
    The project is still a long way to go. I even did not intend to move into the house too fast upon finishing the renovation. Aquatic plants definately non-high light and no extra fast growing weeds. I need something of lower maintenance. Still have work and other tanks to maintain see...


    Back to tank (flashback of jobs done):

    We do have mosquito all the time all year long since it is the tropics right here. The possibily of water getting stuck in the nooks and crannies long enough for mosquito to breed does exist. However since mosquito will never lay their eggs on moving water, the pond and all the moving water part are spared. The passive nooks and crannies however, are made in a way that water will never stay there for too long and drains away.

    If you take a scross section on the backdrop right by the spots with water flowing:

    1. Steel frames with earth, rubble and soil
    2. Base concrete layer (water resistant)
    3. Outer crust
    Base concrete layer which is water resistant will not allow water from backwall watering/waterfall to seep and lost. The outer crust is made in a way that it is light and porous. This way water will not penetrate inside the wall and wet the house structure (or even seep to the other side of the wall). Parts without backwall watering has no layer #2, so basically all water (which is not much) will seeps and drips down either to the pond or to the ground (drainage is already there to handle this).

    top view taken at 3.30 pm


    You can see the opening and all the semi-finished ceiling job and some part of the house, notably part of the unfinished stairs (shows how the job must be slowed down a bit).

    Now the whole base backdrop/cliff is almost complete and will be fine tuned for water cascade. It would be necessary to carve or add some parts so the falling water will drop nicely and to/trough the right spots.

  2. #22
    Join Date
    Jun 2006
    Location
    Jakarta, Indonesia
    Posts
    476
    Feedback Score
    0
    Country
    Indonesia
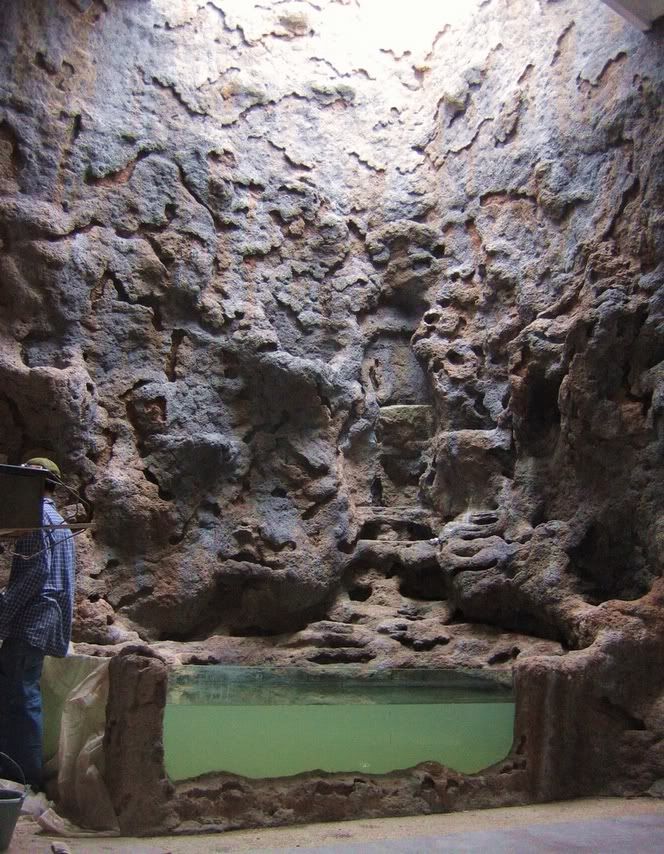
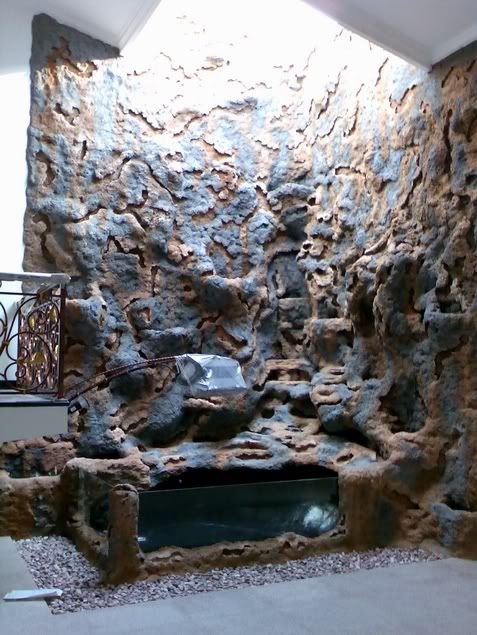
    Talking about filtration. I'm using overflow filtration, so the surface would be always scum and debris free. It is just important to have clear surface in a pond, especialy when you have interesting things to see within.

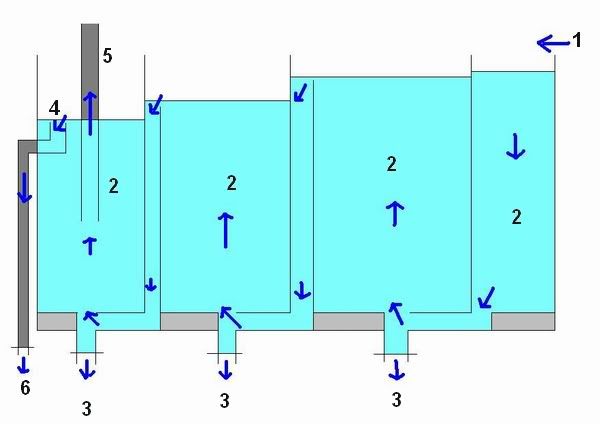
    Here is the planning. Water overflowing from the pond enters filter and go trough chambers of different filter materials. Then water will be collected at the end and pumped back to the pond.


    1. Inlet from pond. Surface will be clean from film and any trash.
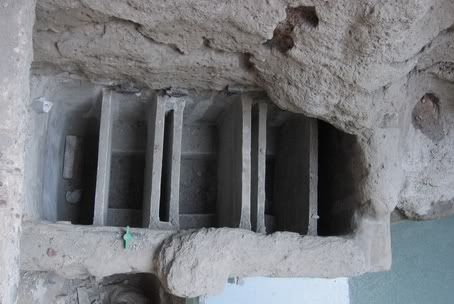
    2. Filter chambers. Will be accordingly filled with brush, ceramic rings, bio balls, filter mat, sponge and filter floss.
    3. Backwash drains (controled by individual valves)
    4. Overflow drain, controlling water level at constant height.
    5. Return line.

    The filter is designed for ease of maintenance. Most dirt, debris, mud, whatever it is will be mainly stuck at the base of each chamber. The valves at the bottom of each chamber serves as backwashing system. Open the valve and the way will ease, draining the silt along. WC is also painless. Just open a valve to the pond, fresh water will mix evenly and end up at the filter as well. Water surface will rise over time and overflow at the filter drain, eliminating excess water. Heavy maintenance can also be done at spot with help of a hose. No need of moving around filter media and mess the house. Simple and easy.

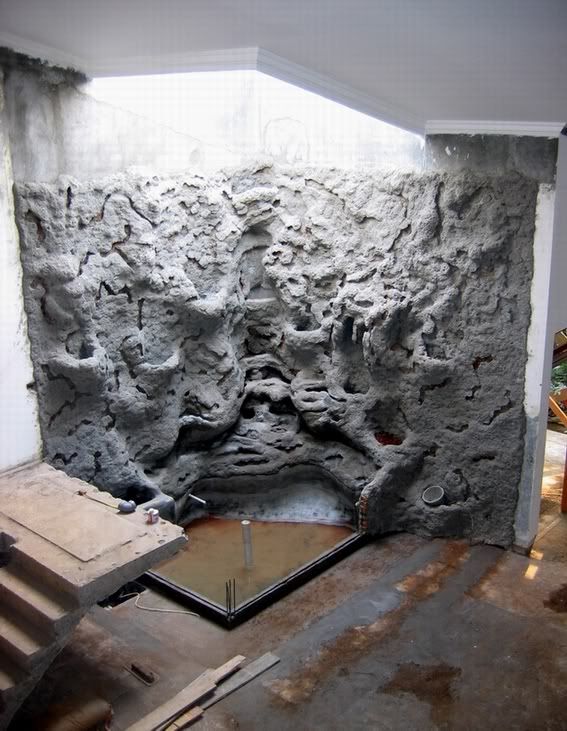
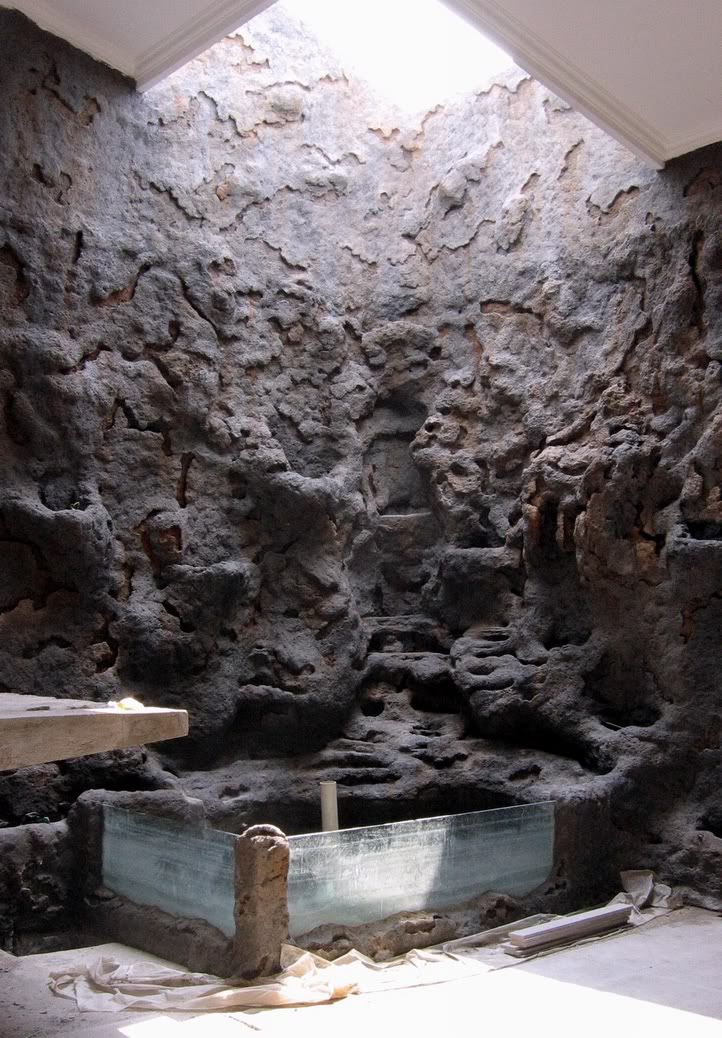
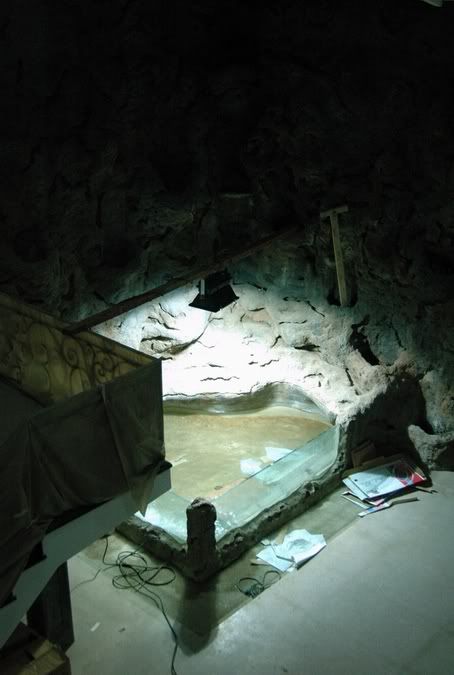
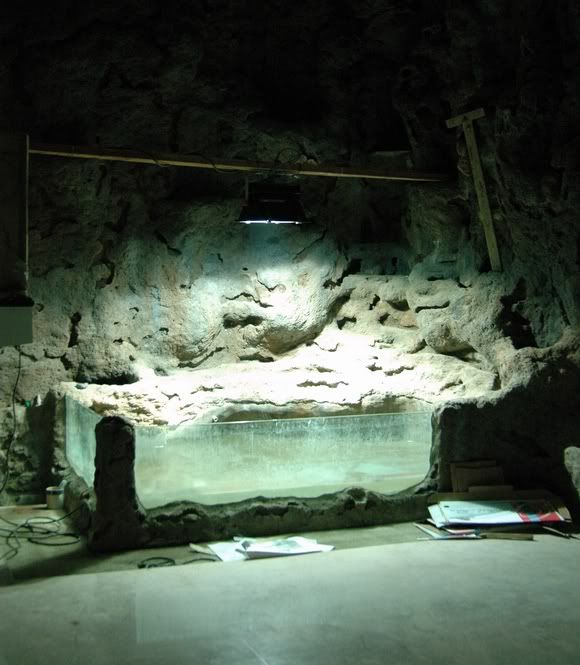
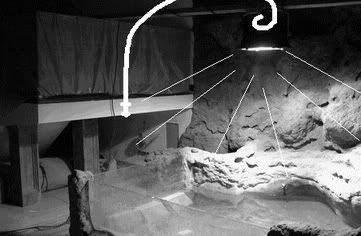
    I proposed a blueprint to my contractor and they did quite well as per requested. Here you can see the chambers taking shape.


  3. #23
    Join Date
    Jun 2006
    Location
    Jakarta, Indonesia
    Posts
    476
    Feedback Score
    0
    Country
    Indonesia
    The cliff part is at last painted.
    I'm presented this kind of colour theme by the team. It still needs another layer to go as the finishing and is going to be roughly the colour later on. The work on the house creates some stirrups and progress on the garden must be on halt accordingly.

    What do you think of the colouring?


    I'm considering to ask for for slightly darker colour with more light highlights for the second layer.

  4. #24
    Join Date
    Jun 2006
    Location
    Jakarta, Indonesia
    Posts
    476
    Feedback Score
    0
    Country
    Indonesia
    So, how is it folks? (the initial colouring)
    Right now the clear roofing is under construction, so the team will not retouch the paint for some time.

  5. #25
    Join Date
    Nov 2003
    Location
    Ang Mo Kio
    Posts
    431
    Feedback Score
    0
    Country
    Singapore
    Very nice one. Hope to see the final result.
    Best Regards, TS
    PlantLog Garden Cryptocoryne, Bucephalandra .....

  6. #26
    Join Date
    Aug 2005
    Location
    Katong
    Posts
    1,339
    Feedback Score
    0
    Country
    Singapore
    Is the pipe in the centre meant for a waterfall? If so, are you intending of colouring it or attaching any flora to it to make it look more natural?

  7. #27
    Join Date
    Nov 2002
    Location
    Bt Batok Blk 116
    Posts
    347
    Feedback Score
    0
    Images
    1
    Country
    Singapore
    The paint colour looks ok to me, was wondering if the lower portion wall paints might dissolve when water flow down.

  8. #28
    Join Date
    Jun 2006
    Location
    Jakarta, Indonesia
    Posts
    476
    Feedback Score
    0
    Country
    Indonesia
    The pipe on the center serves as a temporary hole cover. There is a drain hole by the bottom and it has no valve yet, so a pipe is installed in its place to hold off water. Later on the pipe will be removed and replaced by unvisible-from-the-surface mesh. The only water cascade exist will be from the backwall, flowing gently to avoid splashes, excessive noise and too much CO2 outgassing.

    Not to worry about dissolving paint on the cascade area. It will eventually over time covered by some sort of algae anyway, so colouring will become darkish green in any case. I'll be pre-running it for some time before I fill it with plants and fish, better be safe from uncured cement and paint residue than sorry later. The craftsmen use their own techique of painting and assures me by previous examples of such cliff type holds pigment very well, unlike some other form of cliff texture. The pigment seeps inside and stay that way, once cured it will not leach out. The opening by the top is actually not finished yet and rain battered the whole structure for weeks now. Paint is still looking OK so far.

  9. #29
    Join Date
    Aug 2006
    Location
    ☆ Collect at West Next to Singapore Polytechnic ☆
    Posts
    64
    Feedback Score
    0
    Images
    4
    Country
    Singapore
    wow awesome very artistic

  10. #30
    Join Date
    Jun 2006
    Location
    Jakarta, Indonesia
    Posts
    476
    Feedback Score
    0
    Country
    Indonesia
    As you may already know that the job progressed very slowly since it is a syncronized job to the house under construction. Each must be matched with the house progress in order to prevent damage to each other (ie : dust and mortar from stair work will stain the pond below).

    List of jobs done :
    1. Re-colouring (not final yet). The top part is likely done, but lower part will suffer from house work and will need another retouch.
    2. Perfecting some details on pond and cliff, smoothing up and extra texturing
    3. Finishing the filter chamber (and testing will be next). I still need to cover up the filter later on with something.
    4. Setting the waterworks on waterfall to make the cascade falls as planned. The valves worked as planned that I can control how much water is falling. I would not want too much water and end up having a noisy fall inside the house (and to also think of that excessive surface agitation it created).
    5. Some cleaning job (they actually cleaned my tainted glass good enough ). Murky water...
    6. Frame for the skylight (no glass roof yet, coming soon from workshop).

    Yesterday I came over by request to inspect how the water flows from the pond, then to the filter and returned via the falls and through two underwater jet holes. Everything seems to work perfectly with constant water level before and after the pump runs (important when power is out, no water is wasted just because the pump is off). The 100W pump seems to be too weak for the job though it has the power of H max, but I'd say it lacks the needed GPH. Whenever I turned the valve to the underwater jet open, the flow to the falls would decrease significantly to a point when there is hardly any falling water.
    If bigger pump, special 150-250W pond pumps does not resolve the problem well enough, perhaps I will be adding a powerhead or two in the pond just to improve circulation.

    There are still a lot of work do be done, far away from being planted (which is also good, all that cement mix takes like forever to properly cure and pH lowered to neutral). From automatic watering system (nozzles or misters) to hole covers, from lighting to wiring. Not to mention all the aquascaping stuff involved. I think it is the right time for me to shop for a 400W MH pendant and a couple of 70W ones to even out/visual effect.

  11. #31
    Join Date
    Jun 2006
    Location
    Jakarta, Indonesia
    Posts
    476
    Feedback Score
    0
    Country
    Indonesia
    The skylight roof frame is set. It is made of strong aluminium alloy pieces, might not look like it but is rated to withstand a man cleaning on it (important for ease and safety of maintenance).


    Now waiting for the laminated (double bonded) 10mm glass pieces in production. The glass pieces are also film protected to hold them in place in case of being broken.

    This is going to be a nice addition, not only as a free light source but light up the house as well during the day. Even though with no garden inside, a house will feel better with one of these installed.

    And you can see here that the whole structure is re-painted a second layer. This time you can see more colour contrast and improved saturation, with slightly darker base and more earthy colours.


    This time I'm more satisfied with the paint which look better.

  12. #32
    Join Date
    May 2002
    Posts
    2,240
    Feedback Score
    0
    Images
    141
    Country
    Singapore
    Yes, the paintwork is more natural, I believen once the plants/moss/algae sets in, it would look great, I admire your patience and planning...
    ...I love rubies too ...
    Ken

  13. #33
    Join Date
    Sep 2006
    Location
    Toa Payoh
    Posts
    896
    Feedback Score
    1 (100%)
    Images
    17
    Country
    Singapore

    Thumbs up Gorgeous!!!

    It's an eye opener for me. I'm speechless
    Cheers,
    U.K.Lau

  14. #34
    Join Date
    Jun 2006
    Location
    Jakarta, Indonesia
    Posts
    476
    Feedback Score
    0
    Country
    Indonesia
    Thanks for the compliments.

    OK... it has been too long since there is ever any update, so here I go again.

    As mentioned before that I might be needing a form of extra lighting to supply the lower part of the garden with sufficient light to grow that compact plants and wider selection. And that lighting source other than natural sunlight which hits in enough intensity during noon hours must be artificially made. To light up something this big while looking good, there can be only one way; going for HID. My choise is MH again since HPS would be too yellow and promotes too much of just vegetative growth.

    I pick 400W MH light with tough industrial fixture. All metal alloy casing with reasonable quality reflector combined with 6,000K osram lamp. I know people saying that I might not have enough light intensity and coverage with just 400W and advise double fixture and even a single 1000W MH system.
    My doubt about using 400W MH light is answered from testing, as shown here


    Hanged at around 3-4 feet from expected water surface (shown here with low water level, around 5 feet away), the fixture spreads almost the correct coverage I want. Not too much spills, but lighting up all the pond area as well as a small part of the lower cliff. Easy on the eyes of the viewers and does not obstruct the overall view too much. Anyway when the house is inhabited, there will be gentle ambient light for the house, negating the extreme contrast a bit.

    Selecting 400W light is a correct decision I'd say. You can see part of the cliff is all washed out, indicating how serious 40,000 lumens of light can be even though it is hanged several feet away (compared to several inches in a tank as in CF lights). The top part above the light may be almost pitch dark at night, but during daytime they get much more sunlight than the lower area. That can be fixed easily with mild CF spotlight to create some mellow lighting effects on canopy when it is getting dark.

  15. #35
    Join Date
    Apr 2005
    Location
    Singapore, Pasir Ris
    Posts
    1,616
    Feedback Score
    0
    Images
    19
    Country
    Singapore
    It'll do... though i didn't know there were MHs rated at 100lumens/watt... Most i've seen are those in the 80 - 90 watt range.

  16. #36
    Join Date
    Jun 2006
    Location
    Jakarta, Indonesia
    Posts
    476
    Feedback Score
    0
    Country
    Indonesia
    Well.. almost kinda reaching more than 90lm/W, except for some HPS one

    Several samples of 400W bulbs

    Taken from Philips :
    Watt (W) 400
    Volt (V) -
    Cap Base E40
    Color Temperature (K) 4300
    Lumen (Lm) 35000.0

    Watt (W) 400
    Volt (V) -
    Cap Base E40
    Color Temperature (K) 4000
    Lumen (Lm) 35700.0

    Taken from osram :

    Rated wattage in Watts 400 W
    Luminous flux in lumen (HQI CCG) 34000 lm
    Luminous flux in lumen (NAV CCG) 42000 lm ----> if you count in NAV CCG it would reach 100+lm/W
    System power consumption in W (HQI CCG) 420 W
    System power consumption in W (NAV CCG) 460 W
    Colour temperature in Kelvin (HQI CCG) 6100 K

    HPS :
    Rated wattage in Watts 400 W
    Luminous output in lumen 56500 lm
    Luminous Efficacy in lm/W 141 lm/W


    Anyway here is another view of the light in action. Note that the light is a bit scattered but still acceptable. Lowering the lamp position or adding small side skirts to the fixture will improve concentrating the light area.


  17. #37
    Join Date
    Sep 2006
    Location
    yishun
    Posts
    34
    Feedback Score
    0
    Images
    1
    Country
    Singapore
    sweeeee ,cant wait to see the final result with plant and water running

  18. #38
    Join Date
    Jun 2006
    Location
    Jakarta, Indonesia
    Posts
    476
    Feedback Score
    0
    Country
    Indonesia
    Using spot light type MH and hang them on the canopy might work. But at higher level, more light will be lost and I would end up using much stronger light, such as a single 1000W MH. I think by then I would see some power guzzling issues with other tanks I will be running along :icon_conf

    I'm actually planning to hang the light that low, just for the boost of the pond part since the upper region is already well dreched by stray sunlight. The light itself is actually falling in just nice with no obvious dark spot inside the pond.

    A wrought iron hanger (garden style) specially shaped and mounted from the stairs' side would look sweet. Add in a pivot on the mount, and the hanger could be swinged to free the view, perfect for sunny months when additional light is less needed and overall photo sessions.


    Another idea is to hang the lamp via a cable with a pivot and winch at the ceiling and have the lamp automatically retrieved by the winch out of the way when the light is off. That would be clean and very cool.. but for a guy like me who lives in Jakarta it would prove a big challenge.

  19. #39
    Join Date
    Apr 2005
    Location
    Singapore, Pasir Ris
    Posts
    1,616
    Feedback Score
    0
    Images
    19
    Country
    Singapore
    I'd go with the cable if i were you. At the very least use stainless steel for the stand.

  20. #40
    Join Date
    Jun 2006
    Location
    Jakarta, Indonesia
    Posts
    476
    Feedback Score
    0
    Country
    Indonesia
    As expected, the finishing on the project was devastated by the surrounding works. Should have done things slowly on this pond, at least don't do the finishing yet and wait for the house.

    Here you go, a teaser pic (taken with 2MP mobile) after some good cleaning and detail retouch. At last construction and renovation is coming to an end, dust settles and it is getting clean enough to re-finish the whole thing.


    Expect some more updates in a couple of days.

Page 2 of 14 FirstFirst 12345612 ... LastLast

Bookmarks

Posting Permissions

  • You may not post new threads
  • You may not post replies
  • You may not post attachments
  • You may not edit your posts
  •