Advertisements
Aquatic Avenue Banner Tropica Shop Banner Fishy Business Banner
Page 1 of 17 1234511 ... LastLast
Results 1 to 20 of 335

Thread: 2ft Optiwhite - The Rising Sun

  1. #1
    Join Date
    Feb 2008
    Posts
    3,149
    Feedback Score
    11 (92%)
    Country
    Singapore

    2ft Optiwhite - The Rising Sun

    Advertisements
    Fresh n Marine aQuarium Banner

    Advertise here

    Advertise here
    Here it goes! My mock up opti-white tank "The Rising Sun" using Photoshop adding photos of plant and hardscape. The scape has since evolve differently. More pictures to come on the way... being very busy lately... Btw i love this opti-white tank.

    Tank size : 60cm X 40cm X 40cm (8mm thickness)


    --->>> more to come... slowly...
    Last edited by blue33; 30th Nov 2008 at 15:44.

    MISSION ACCOMPLISHED!!! TIME TO LAY BACK AND RELAX!
    A Journey Of A Thousand Miles Begins With A Single Step

  2. #2
    Join Date
    Apr 2008
    Location
    West Midlands, UK
    Posts
    1,076
    Feedback Score
    0
    Country
    England
    That foreground looks very unique. Do you actually plan to plant what appears to be a dwarf riccia. It certainly has the "curtained" effect that is common with well grown dwarf riccia.

    The only bit that looks odd is the large "bush" in the right corner. Looks weird in contrast to the stem plant in the left corner which you plan to have.

    Will be keeping my eye on how this progresses
    Verminator

    Aquatic fanatic and keen learner of aquascaping

    The canvas is what you make it...

  3. #3
    Join Date
    Dec 2007
    Location
    Central
    Posts
    2,772
    Feedback Score
    1 (100%)
    Country
    Singapore
    Looking forward to seeing it when everything is finalised.

  4. #4
    Join Date
    May 2002
    Posts
    2,240
    Feedback Score
    0
    Images
    141
    Country
    Singapore
    Interesting scape , try one with white river sand in the foreground.
    ...I love rubies too ...
    Ken

  5. #5
    Join Date
    Feb 2008
    Posts
    3,149
    Feedback Score
    11 (92%)
    Country
    Singapore
    Quote Originally Posted by Verminator View Post
    That foreground looks very unique. Do you actually plan to plant what appears to be a dwarf riccia. It certainly has the "curtained" effect that is common with well grown dwarf riccia.

    The only bit that looks odd is the large "bush" in the right corner. Looks weird in contrast to the stem plant in the left corner which you plan to have.

    Will be keeping my eye on how this progresses
    The foreground is now river white sand. Yes is dwarf riccia, here we called mini riccia. Was quite worry on the bush effect but it turned out to be the best part after setup, you'll see the update in later part. You'll like it i guess.

    Quote Originally Posted by torque6 View Post
    Looking forward to seeing it when everything is finalised.
    Hopefully it turn out to my expectation, currently 70% turn up to be expected, as some of the plant melted but is recovering back, is normal they reborn itself again.

    Quote Originally Posted by Fei Miao View Post
    Interesting scape , try one with white river sand in the foreground.
    The scape was a mock up in early stage, after wife some suggestion, it has a new image again, will update soon. The foreground now is white river lapis sand, didnt realised when i bought it, was more brown colour, luckily the boss let me change again after few days.
    Last edited by blue33; 30th Aug 2008 at 12:59.

    MISSION ACCOMPLISHED!!! TIME TO LAY BACK AND RELAX!
    A Journey Of A Thousand Miles Begins With A Single Step

  6. #6
    Join Date
    Feb 2008
    Posts
    3,149
    Feedback Score
    11 (92%)
    Country
    Singapore
    Was busy setting up my SUPER Core2 Quad processor computer! 
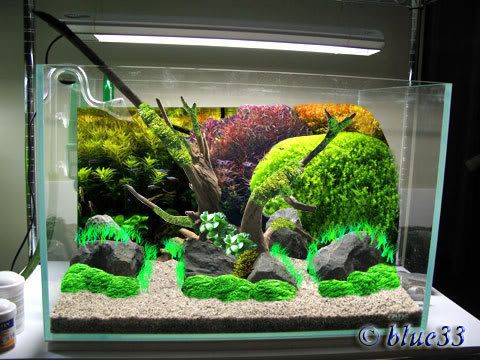
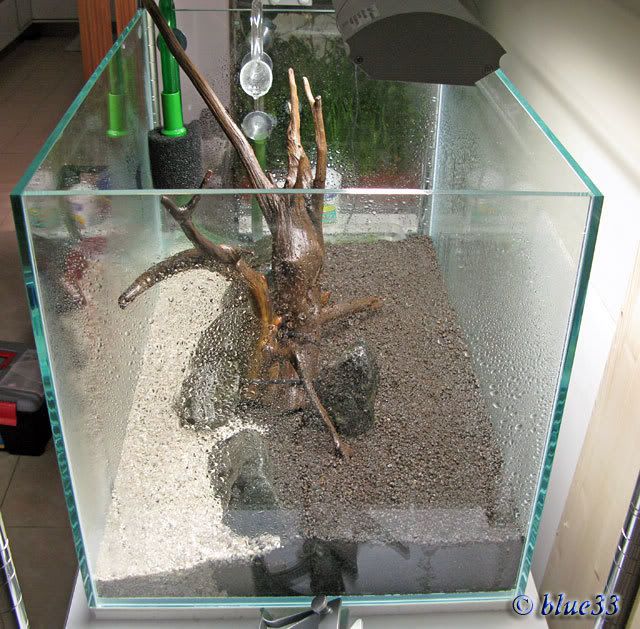
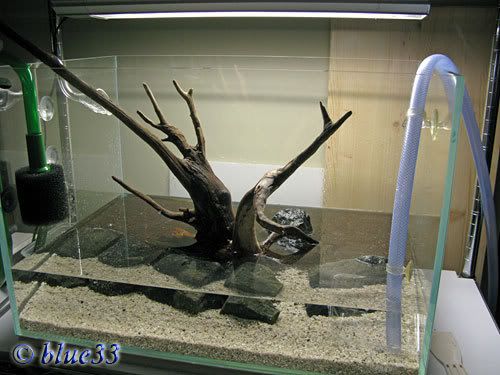
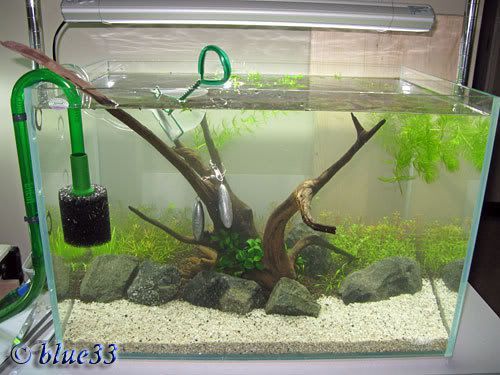
Ok! Time for updating, since my laptop slow down my photo editing tools.
    Last edited by blue33; 5th Sep 2008 at 00:37.

    MISSION ACCOMPLISHED!!! TIME TO LAY BACK AND RELAX!
    A Journey Of A Thousand Miles Begins With A Single Step

  7. #7
    Join Date
    Feb 2008
    Posts
    3,149
    Feedback Score
    11 (92%)
    Country
    Singapore
    DIY stuff! My own design fishing leads line for hanging the lights and fan, each line can hold around 22kg, cause is make of metal line.

    Tools as below,


    Here's the final product,


    How it works,


    And here's the final layout, for lights and fan also,

    MISSION ACCOMPLISHED!!! TIME TO LAY BACK AND RELAX!
    A Journey Of A Thousand Miles Begins With A Single Step

  8. #8
    Join Date
    Feb 2008
    Posts
    3,149
    Feedback Score
    11 (92%)
    Country
    Singapore
    Here's the tank testing for any leaking, 60cm X 40cm x 40cm (8mm) opti-white tank.


    MISSION ACCOMPLISHED!!! TIME TO LAY BACK AND RELAX!
    A Journey Of A Thousand Miles Begins With A Single Step

  9. #9
    Join Date
    Feb 2008
    Posts
    3,149
    Feedback Score
    11 (92%)
    Country
    Singapore
    Tools for scaping the sand, bought it from DIY shop(Singapore), cost around $1.35(SGD), it also can use for scraping algae on the glass. Make of tough plastic.


    MISSION ACCOMPLISHED!!! TIME TO LAY BACK AND RELAX!
    A Journey Of A Thousand Miles Begins With A Single Step

  10. #10
    Join Date
    Feb 2008
    Posts
    3,149
    Feedback Score
    11 (92%)
    Country
    Singapore
    Wood structure being soak for awhile already, ready for arranging.


    The white styrofoam is the separator for the white lapis sand and aqua soil.

    MISSION ACCOMPLISHED!!! TIME TO LAY BACK AND RELAX!
    A Journey Of A Thousand Miles Begins With A Single Step

  11. #11
    Join Date
    Jul 2006
    Location
    Telok Blangah, SGP
    Posts
    10,216
    Feedback Score
    3 (100%)
    Images
    78
    Country
    Singapore
    Your rack may not be strong enough to support the tank+water+substrate weight
    -Robert
    Aquascaping is a marriage between Art and Farming
    My Blog: http://aquatic-art.blogspot.com/

  12. #12
    Join Date
    Feb 2008
    Posts
    3,149
    Feedback Score
    11 (92%)
    Country
    Singapore
    Timing to fill in the soil. Change a thinner styrofoam separator. Stones use is to stable the separator and the soil moving around. Some of the equipment also in place to see how it look like.

    The lapis sand bought initially was too brown, went back to the LFS again to change to a more whiter one, didnt know they have different colour of lapis sand though all the same. 
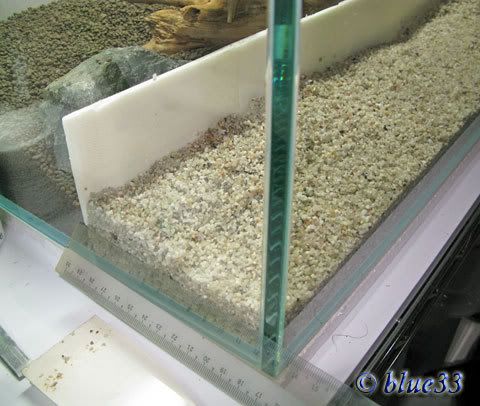
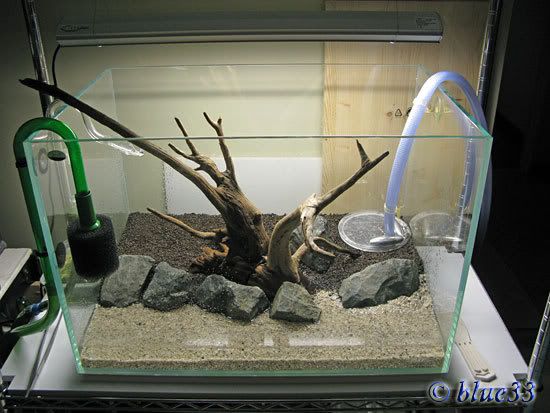
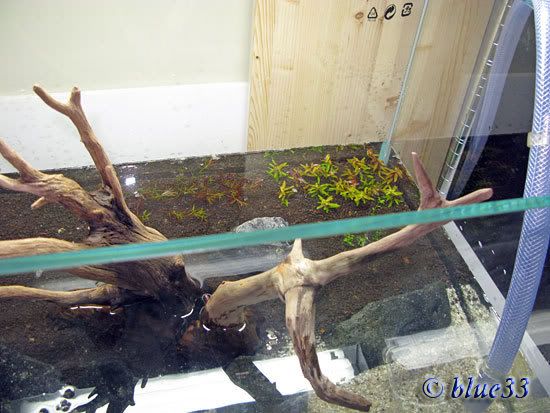
Aqua soil looks like chocolate chips to me, feel craving for chocolate each time i look at it.


    Used a ruler to measure both sides of the soil(i know the photograph is showing one cm and the other is inches, but they are same reading/distance).


    MISSION ACCOMPLISHED!!! TIME TO LAY BACK AND RELAX!
    A Journey Of A Thousand Miles Begins With A Single Step

  13. #13
    Join Date
    Feb 2008
    Posts
    3,149
    Feedback Score
    11 (92%)
    Country
    Singapore
    Time to remove the separator.


    Perfect straight line! Loves it! 
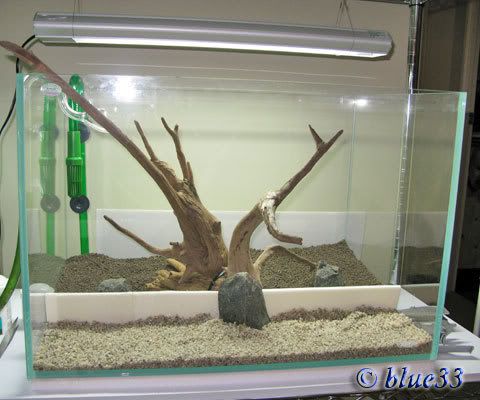
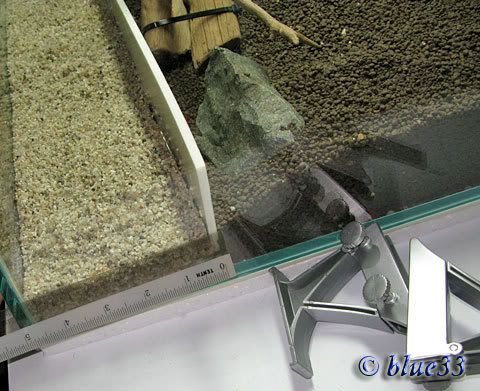
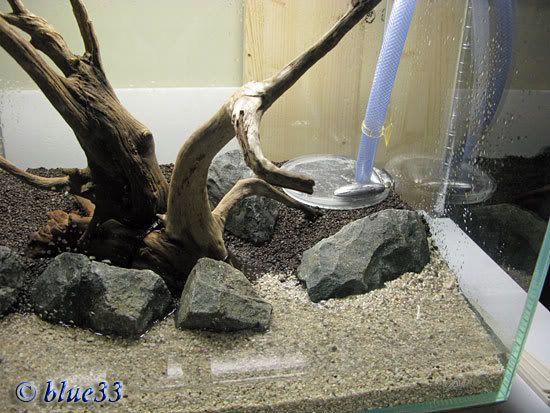
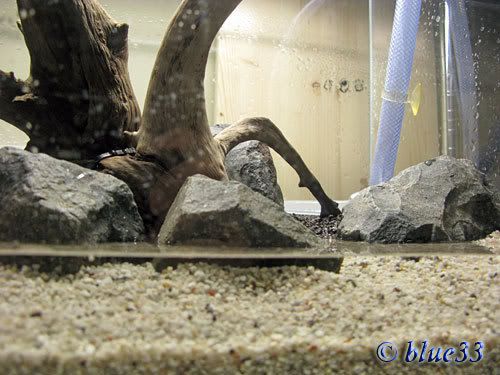
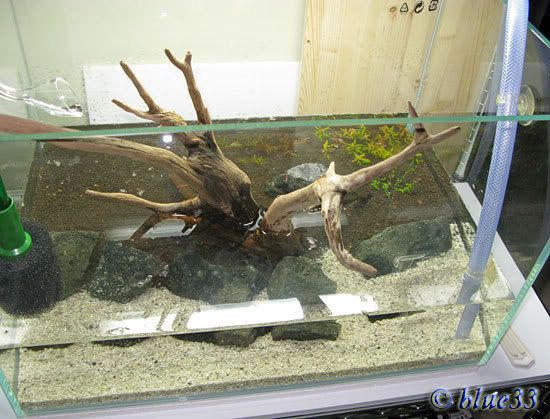
Will shift some of the soil to make it more natural after placing the rocks in. More rocks coming soon...

    MISSION ACCOMPLISHED!!! TIME TO LAY BACK AND RELAX!
    A Journey Of A Thousand Miles Begins With A Single Step

  14. #14
    Join Date
    May 2008
    Posts
    2
    Feedback Score
    0
    Country
    Malaysia
    Very nice and very special scape....

  15. #15
    Join Date
    Feb 2008
    Posts
    3,149
    Feedback Score
    11 (92%)
    Country
    Singapore
    After arranging the rocks, is time to mist the soils before flooding the tank. After misting the soil, i let it settle down for around 30-60mins, so that the dust and soil will cement down, this way the water will not be cloudy at all.


    I mean mist the soil and not flood.


    MISSION ACCOMPLISHED!!! TIME TO LAY BACK AND RELAX!
    A Journey Of A Thousand Miles Begins With A Single Step

  16. #16
    Join Date
    Feb 2008
    Posts
    3,149
    Feedback Score
    11 (92%)
    Country
    Singapore
    Is time to flood 1/3 of the tank with water, for planting convenience.


    You can see the water is crystal clear during flooding. I use the plastic cover for introducing water to the tank to prevent any rushing of water causing cloudy.


    MISSION ACCOMPLISHED!!! TIME TO LAY BACK AND RELAX!
    A Journey Of A Thousand Miles Begins With A Single Step

  17. #17
    Join Date
    Feb 2008
    Posts
    3,149
    Feedback Score
    11 (92%)
    Country
    Singapore
    Next step is to prepare the plants for planting, remove any death plants or roots. I use Toyogo box cover for my plant arranging.


    Plant surgery! 
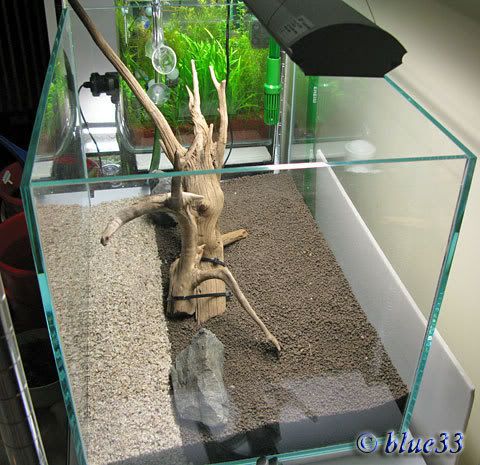
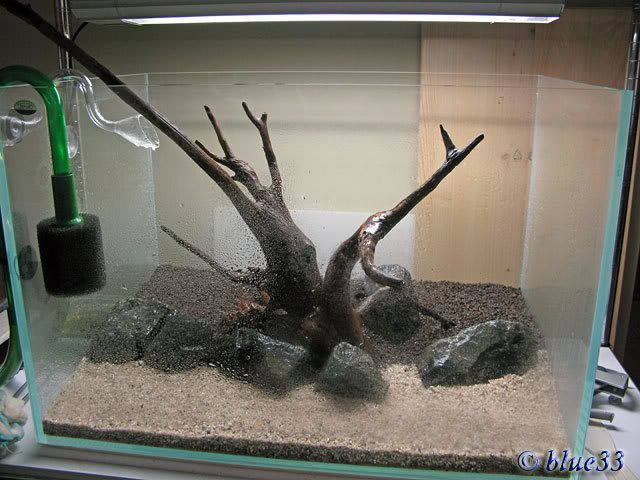
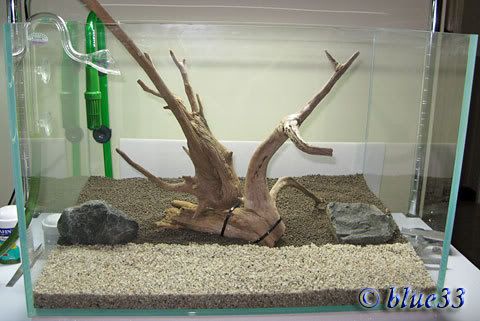
As usual trimming off and cutting.
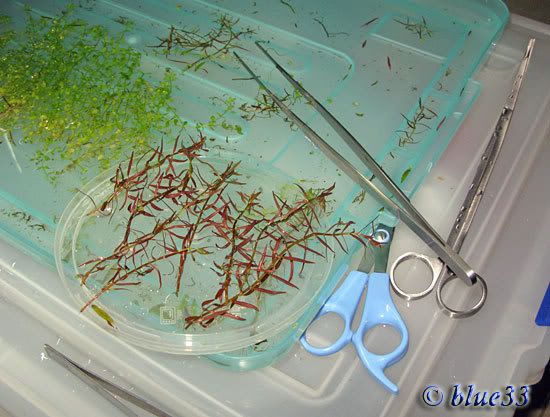
 Plastic cover is good for holding plants during planting than hand.


    MISSION ACCOMPLISHED!!! TIME TO LAY BACK AND RELAX!
    A Journey Of A Thousand Miles Begins With A Single Step

  18. #18
    Join Date
    Feb 2008
    Posts
    3,149
    Feedback Score
    11 (92%)
    Country
    Singapore
    Quote Originally Posted by Shadow View Post
    Your rack may not be strong enough to support the tank+water+substrate weight
    Is about a month already! Saw in internet, quite no of people using it, got to get those thick bar one, not those thin one. And got to place a kapo board to distribute the load.

    MISSION ACCOMPLISHED!!! TIME TO LAY BACK AND RELAX!
    A Journey Of A Thousand Miles Begins With A Single Step

  19. #19
    Join Date
    Feb 2008
    Posts
    3,149
    Feedback Score
    11 (92%)
    Country
    Singapore
    Filled 1/3 tank with water and start to do planting, really backache after doing this. Lots of elbow work.


    MISSION ACCOMPLISHED!!! TIME TO LAY BACK AND RELAX!
    A Journey Of A Thousand Miles Begins With A Single Step

  20. #20
    Join Date
    Feb 2008
    Posts
    3,149
    Feedback Score
    11 (92%)
    Country
    Singapore
    Filling up the tank with water, fix the filter inlet with sponge to collect dirts and use net at outlet to collect debris. Got a fishing lead weight to weight down the wood to prevent from floating as i've taken out the wood for quite sometime .

    Added hornworts to suck the nutrients. Water is still pretty clear at this time. Added Petite Nana between the wood also. Will tie the wood with moss later part cause the wood still in semi floating stage.


    MISSION ACCOMPLISHED!!! TIME TO LAY BACK AND RELAX!
    A Journey Of A Thousand Miles Begins With A Single Step

Page 1 of 17 1234511 ... LastLast

Bookmarks

Posting Permissions

  • You may not post new threads
  • You may not post replies
  • You may not post attachments
  • You may not edit your posts
  •