Hi guys!
UPDATE 5th April 2010:
The light has run for 8hrs, and heating had not been an issue. The aluminium bar is warm-hot, but you can hold your fingers to it indefinitely without being "burnt" or scalded.
Not tested, but in my opinion lesser or approximately similar amounts of heat is dissipated by the LEDs compared to the 18W PL. (both are rated as a total of 18W)
Plant-wise, the bubbling has been really I would say, insane. With the PL light only very minimal bubbling is observed, with the current LED light all my plants are bubbling insanely, even the java ferns and my rotala. Very pleased with the result. (yes, some might say bubbling is not a direct indicator of plant performance, but to me, with all things maintained, it indicates increased photosynthesis by my plants. Especially the HC! =)
Lastly, the shimmer effect is -SWEET-.
---------------------------------------------------------------------
TIPS FOR FELLOW LED ADVENTURERS:
Disclaimer: My opinions only. Follow at your own risk!
Mounting
I prefer to be able to remove my LEDs cleanly if I need to, thus I went for drilled holes and bolts+nuts. A clean and simple setup, not too hard to arrange LEDs on aluminium bar, mark holes with a marker, nail-punch the holes and drill them with a 3mm bit. Aluminium is soft and easy to drill. place a dot of thermal paste, press the LED onto the bar and bolt it on tightly with 2 bolts.
Alternatives: Thermal adhesive pads (quick fast, but I personally do not like the stickiness and mess), Thermal Epoxy (quick fast, but very permanent bond)
Soldering
It has been raised as a concern on forums that soldering the wires to the LED's contacts is rather hard, especially if you want to do it after mounting the LEDs.
However I found that throughout my process I have not had any issues. You need to mount and solder, to get the alignment right. Here's what I did:
First heat each contact pad on the LEDs and melt a bit of solder, so there's a nice shiny bump of solder on all the pads. Next, cut and strip both ends of a length of multi-core wire rated for 1A slightly longer than the distance between the two points, so it can be bent slightly. Tin both ends of the wire with solder (heat and melt solder on the wires, so they are coated with a layer of solder). To solder the wire onto the contact pad, place wire on top of the shiny bump of solder on the pad, heat briefly with the soldering iron and the wire should "sink" into bump. Remove solder iron, and TA-DAH! a fast and nice solder joint!
Use a bent fine-nosed pliers to hold the wire end in place while your other hand wields the iron.
Cooling/Heatsinks
Technically the entire aluminium bar can serve as a giant heat sink, but if you are paranoid like me you can use thermal epoxy to permanently stick the heat sinks to the area directly behind the LEDs. Heatsinks are cheap, so I do not care if they can be removed later =)
Heatsinks will work only if the dissipated heat can be removed. Either drill holes on top to allow the warm air to rise and escape, or simply direct a fan to blow across on on the whole light setup.
Alternatives: Other forumners have had success with mounting the LEDs directly on large CPU or graphics card heatsinks. Best way to do it is use thermal epoxy to mount. If you want to use screws you'll have to tap the drilled holes, very troublesome.
Power
There are two options of powering your LEDs with a constant current source. A constant current source is required for these high powered LEDs, and you will be connecting them in series.
AC-DC Driver: These guys can be found on
www.besthongkong.com and delivers a constant current of 600mA (I think) and can power up to 6 3W LEDs. You connect power leads from a 3-pin wall plug to one end, and the LEDs to another end. These drivers come in a bare PCB board, so getting a plastic project box from SimLim Tower to house it will be a good idea, along with some water-proofing. This is used by bro ervinelim in his LED setup.
This method is good because it cuts out one more component, and is very fast and simple.
DC-DC Driver, or Buckpuck: These guys take in a higher DC voltage, and then outputs a constant current source. They come in different flavours, such as the 700mA or 1000mA ones, with dimming function etc. They can be found at
http://www.ledsupply.com . For this you will need to find a AC-DC wall adaptor to provide the DC input, 4 volts for each Cree LED.
Also, you need to ensure the adaptor can handle an output of at least 1.5-2A. For e.g. I am using the 700mA Buckpuck to run 6 LEDs, so I got a 24Vdc 2.5A adaptor which I salvaged from an Uzap. The only household adaptor which uses up to 24V I've found are the OSIM Uzaps. Even laptops only use like 19V. If not, you can buy one from SLT for like $20+.
I chose this route so I can leave the AC-DC conversion to the adaptor and not mess with scary AC current directly myself. Plus, with the 24Vdc you have the flexibility of adding two 12V PC fans in series to the setup. The Buckpuck also provides dimming options.
---------------------------------------------------------------------
Finally got down to making the DIY light this long weekend along with bro reveru. (you guys might know him from his 2ft tank thread on Aquascaping forum)
This will largely be a pictorial account of the process, with captions here and there.. will update with more information e.g. price, exact steps etc in the future. kinda short on time now hehe..
Removed the optics eventually cuz the spread was not enough.
Please feel free to post questions here! I will try my best to answer the queries!
Parts:
- 6 Crees LED Q5 bin - ~USD$5 http://www.dealextreme.com/details.dx/sku.2394
- Bolts and nuts - SimLim Tower - ~S$2
- Buckpuck 700mA Constant Current DC-DC converter - ~USD$18 http://www.ledsupply.com
- 24V AC-DC adaptor from old Uzap
- Aluminium bar - S$10 for 2 IKEA
- 6 Heatsinks - ~S$4 SimLim Tower
- Aquazonic Light - S$15 LFS (removed guts manually)
- Arctic Silver 5 Thermal Paste - USD$13 http://www.ledsupply.com
- Arctic Silver Thermal Adhesive - USD$13 http://www.ledsupply.com
Here goes!
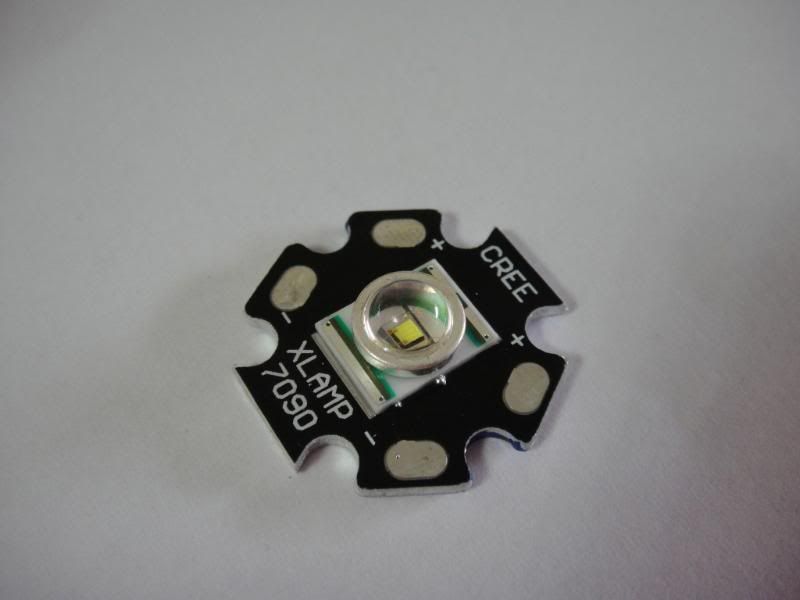
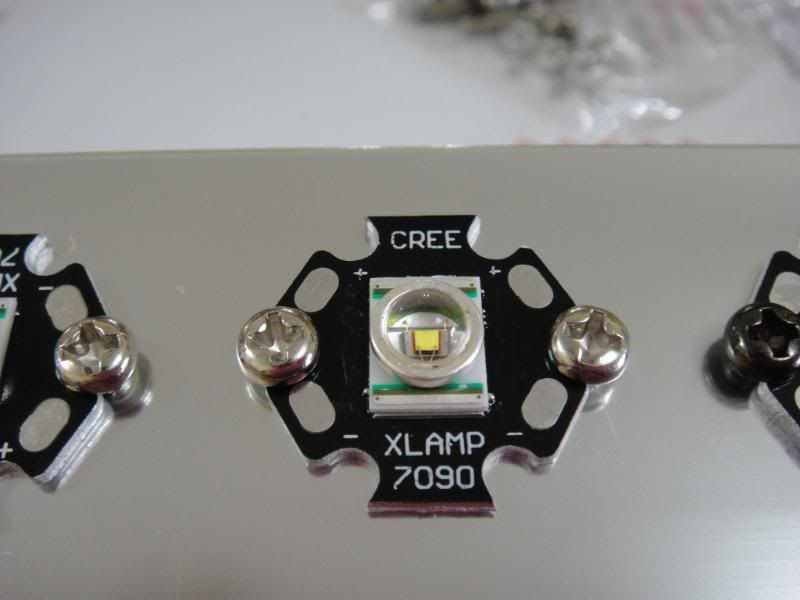
The Cree LED
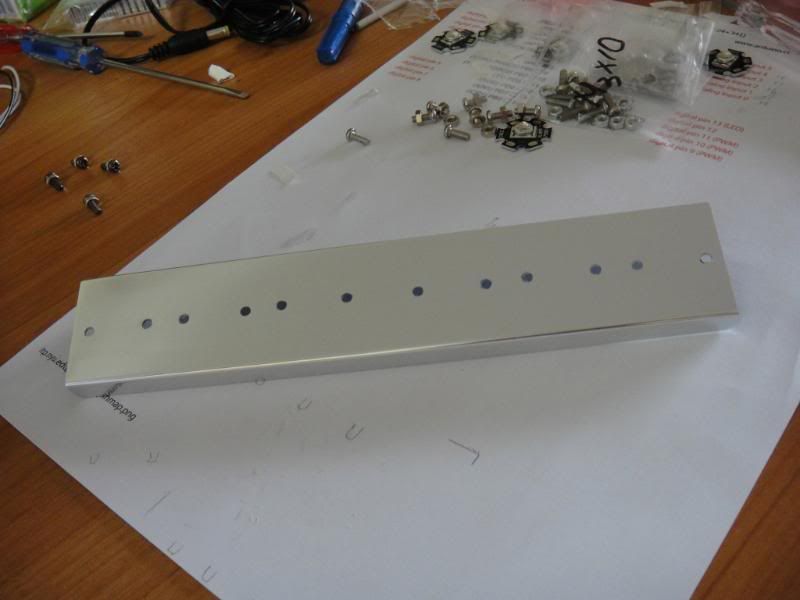
The Aluminium Bar with holes drilled in
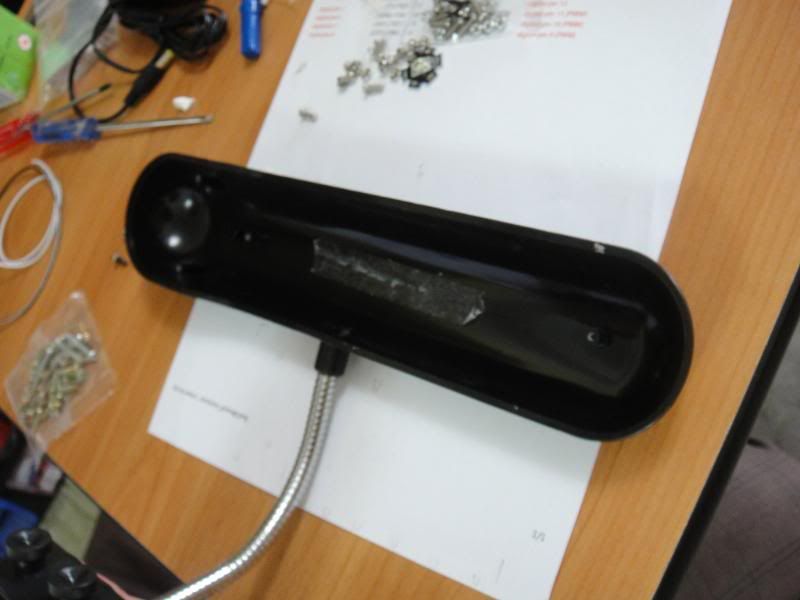
Aquazonic Light with guts removed
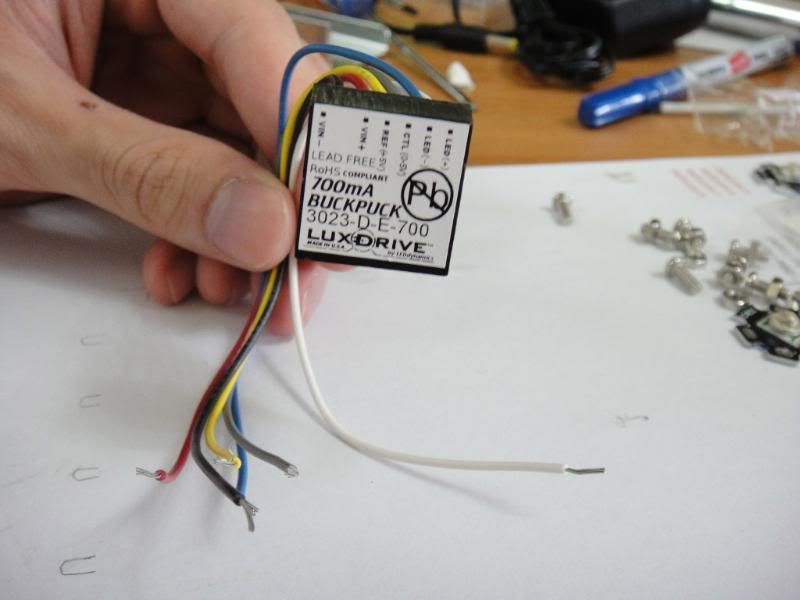
Buckpuck for providing constant 700mA
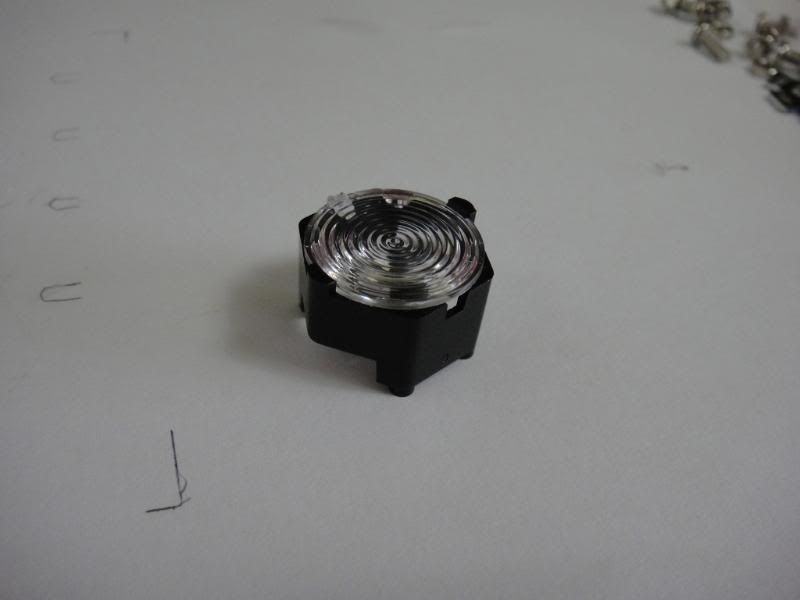
47degree spread optics and holder

Crees bolted into the aluminium bar
Up-close of bolted Cree

Wires all soldered up

Up-close wires soldered up

Drilled holes for mounting bar
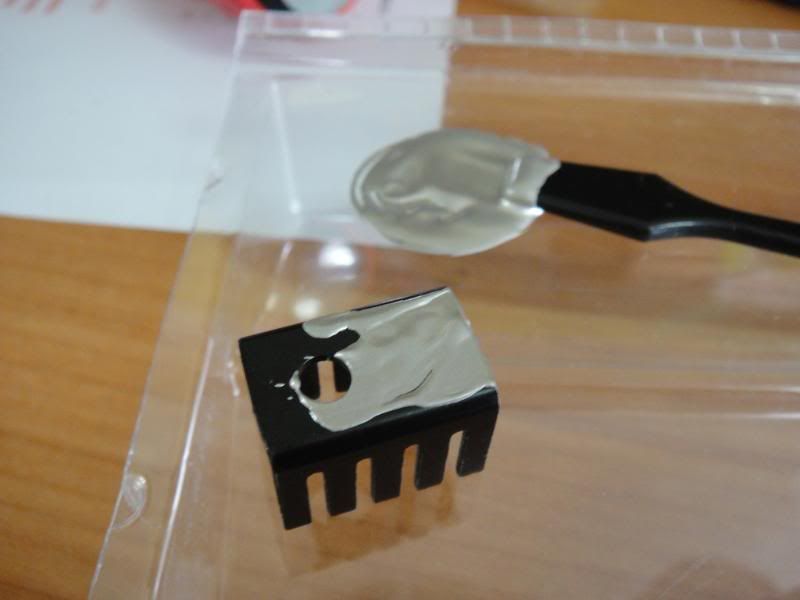
Heatsink with applied thermal epoxy
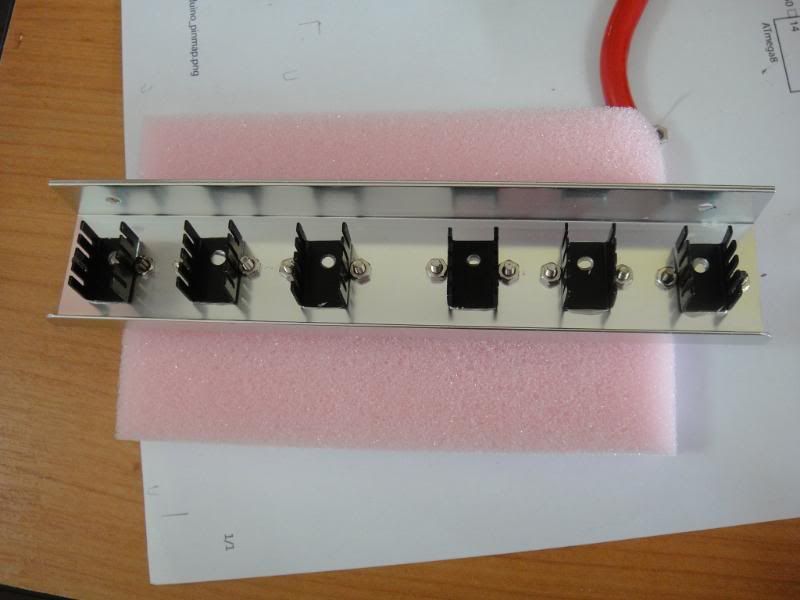
Heatsinks applied
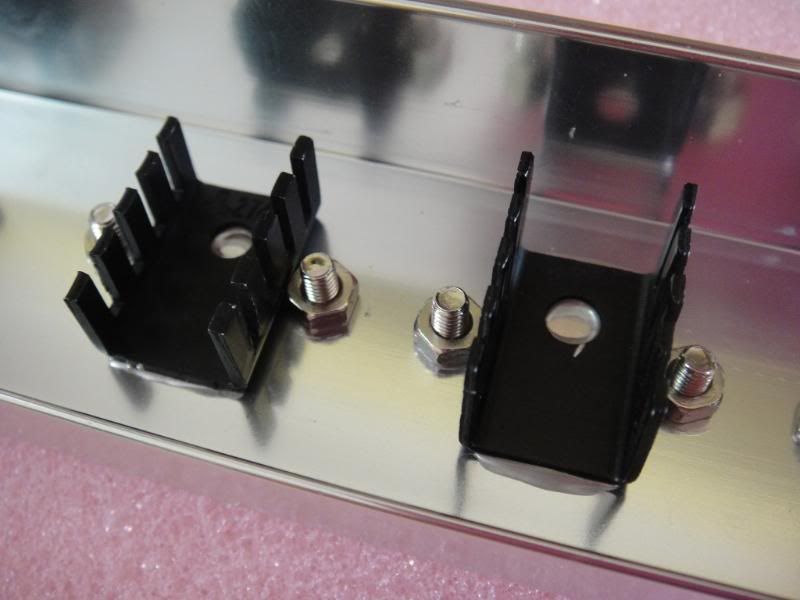
Heatsinks up-close
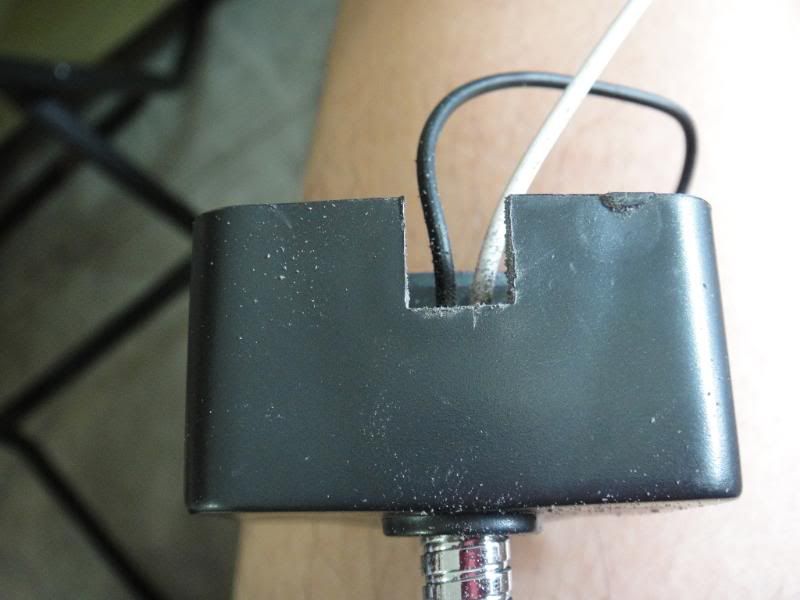
Filed out hole for mounting power plug
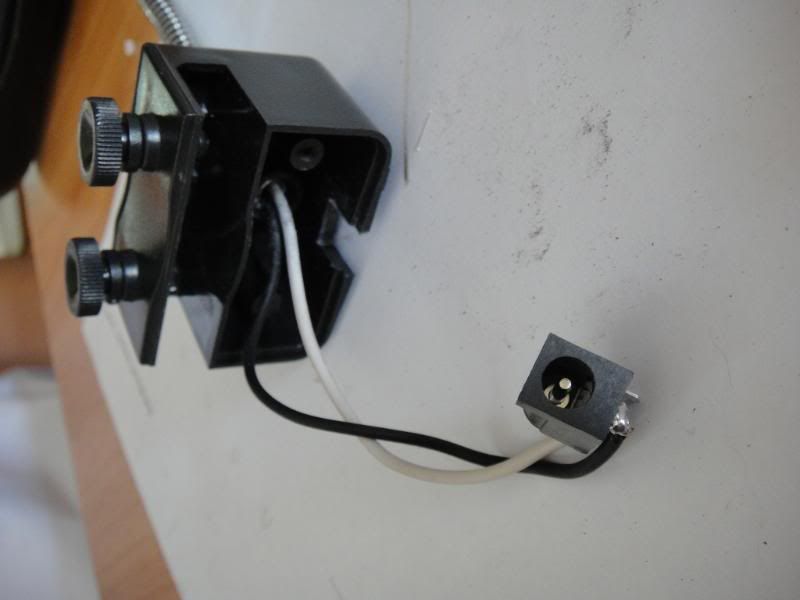
Power plug attached to power leads going through neck
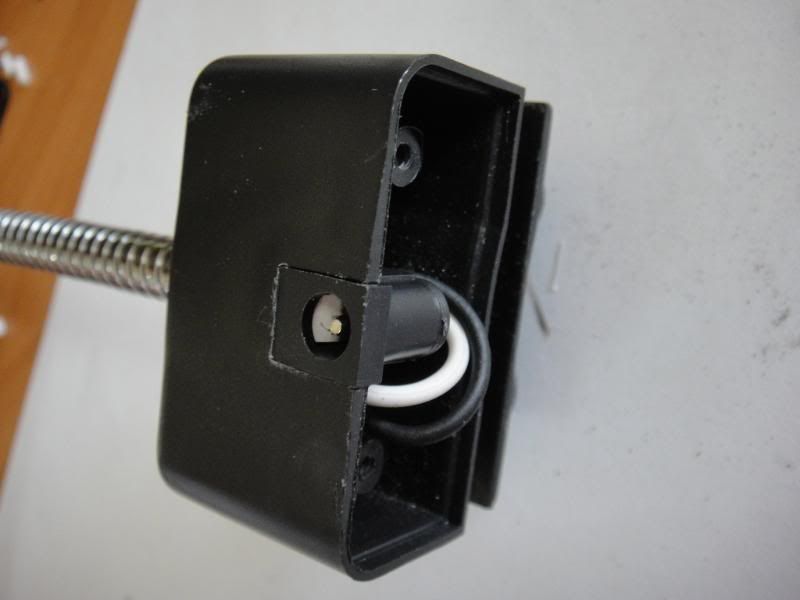
Power plug epoxied in
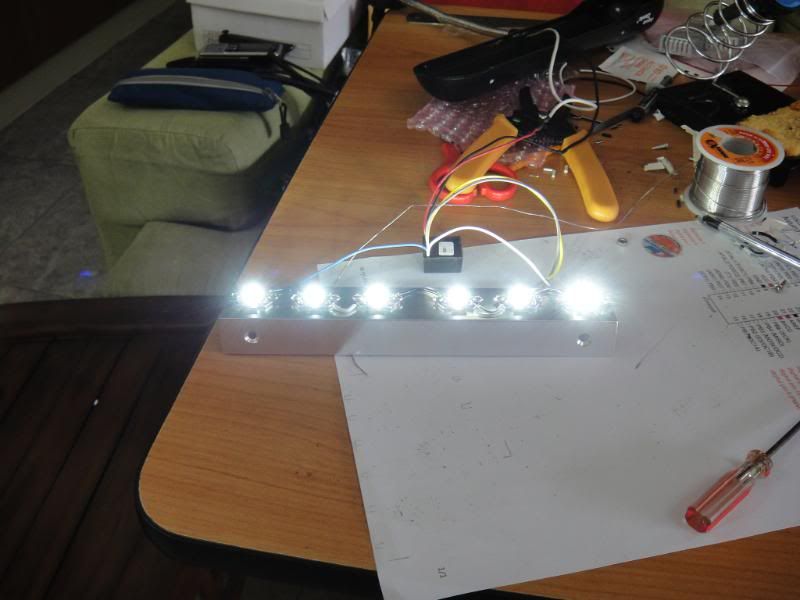
Test-run it works!

Back-view of Buckpuck connected
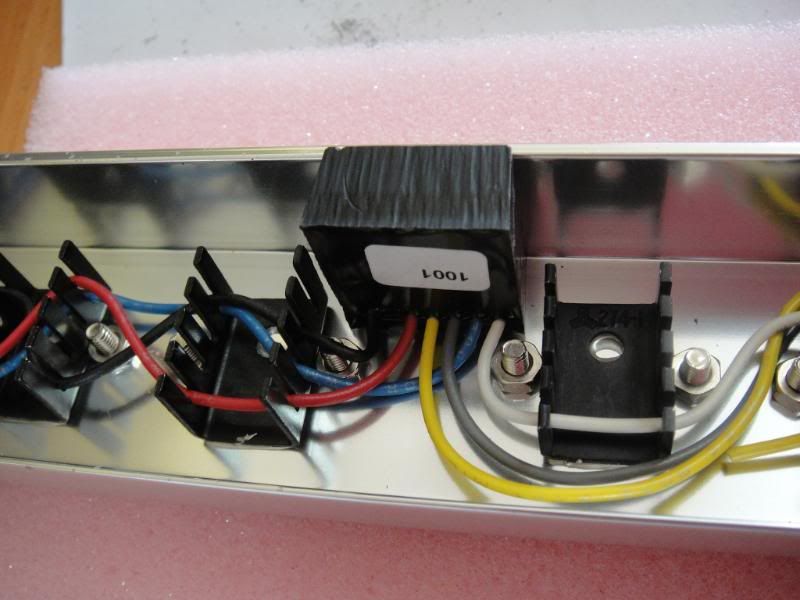
Up-lose of Buckpuck


 Reply With Quote


Bookmarks