


 Reply With Quote
This is so cool, making your own cabinet. The end result looks like done by professional. But shouldnt this be in the D.I.Y section?haha.


My dad had some leftover teak timber and panelling. So instead of letting it go to waste, I made a solid teak cabinet for my new 90x45x45 optiwhite cade tank.
warning - picture intensive.
he goes.....oh no! I forgot how to even upload! okay okay..i found out already.
so here goes, c&c welcomed....
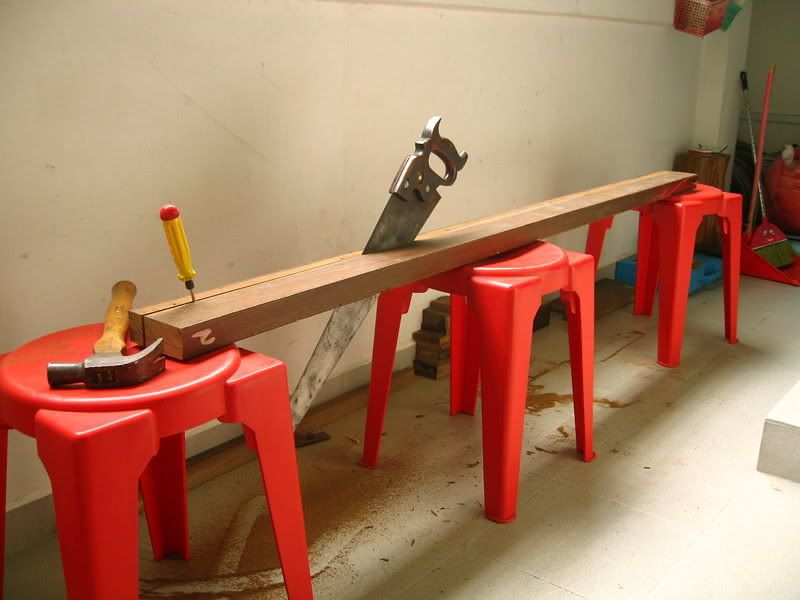
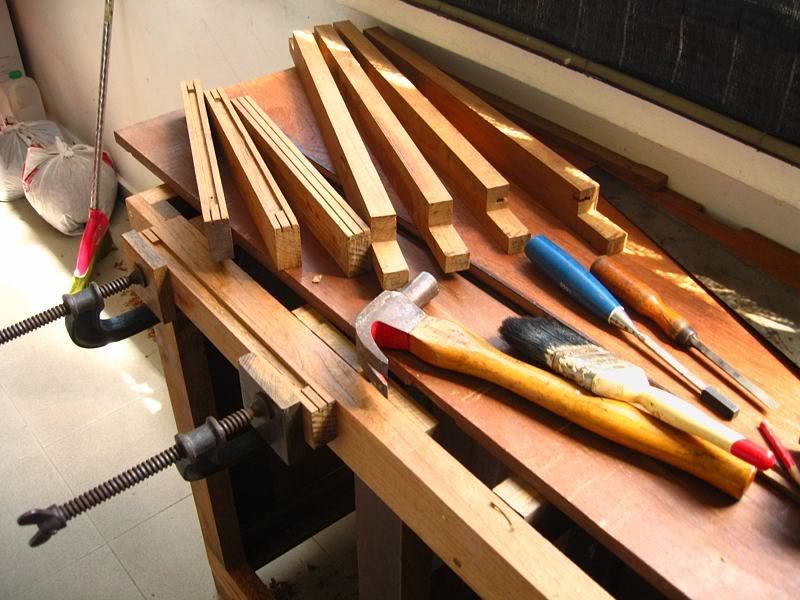
cutting the raw timber dn to size.
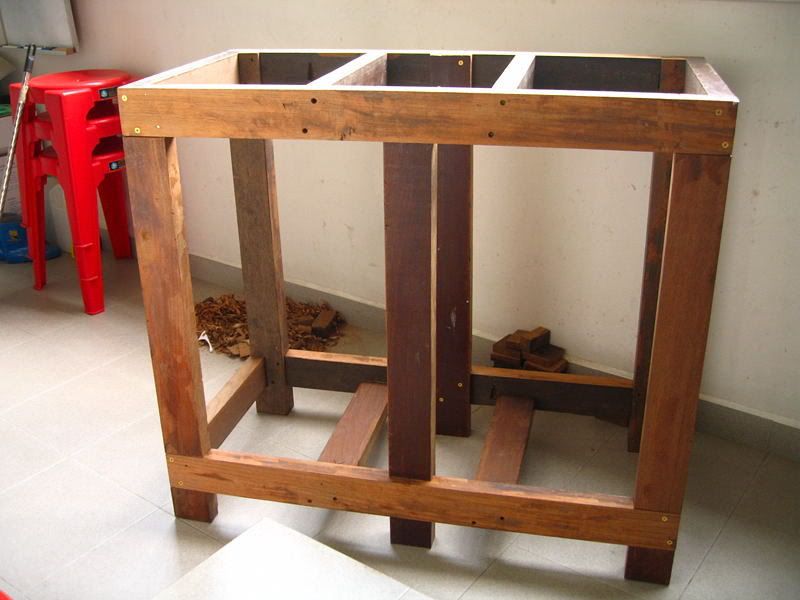
cut building progress short. the finished cabinet frame building. all using 75x50mm teak wood.
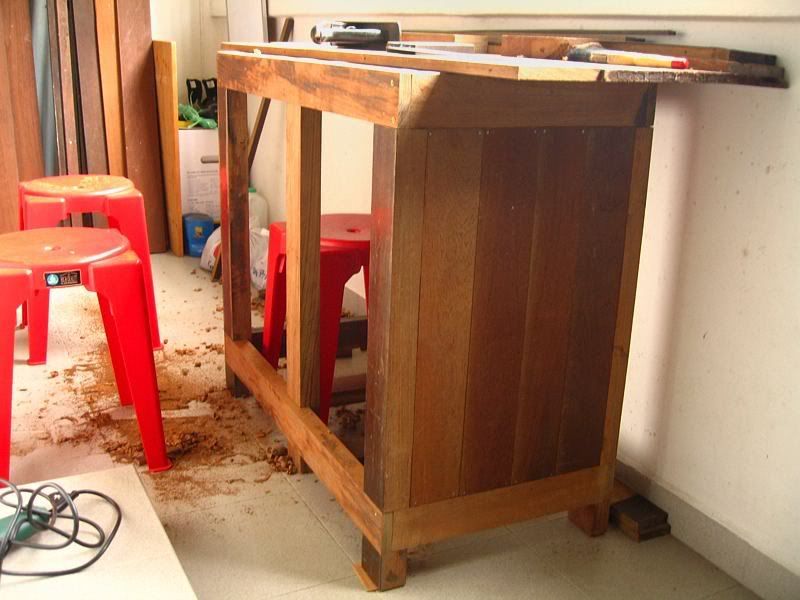
12mm thk teak panelling done to the right side.
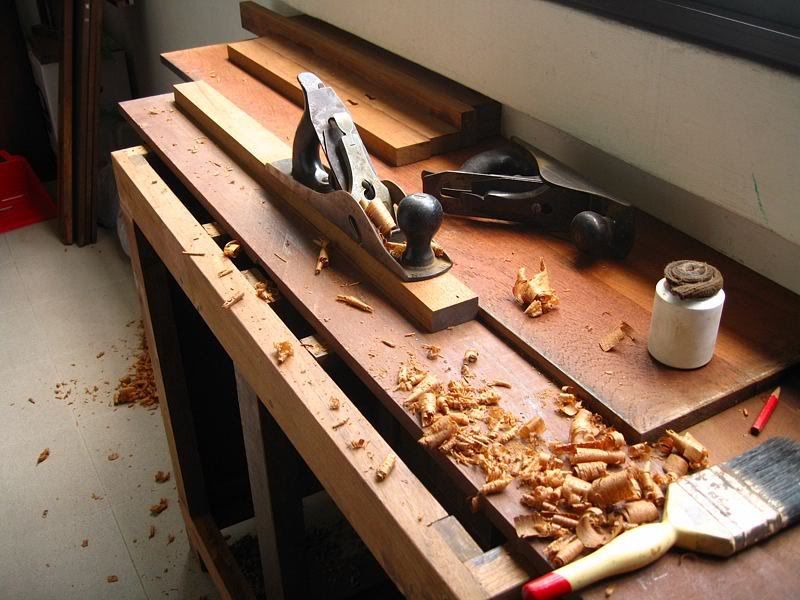
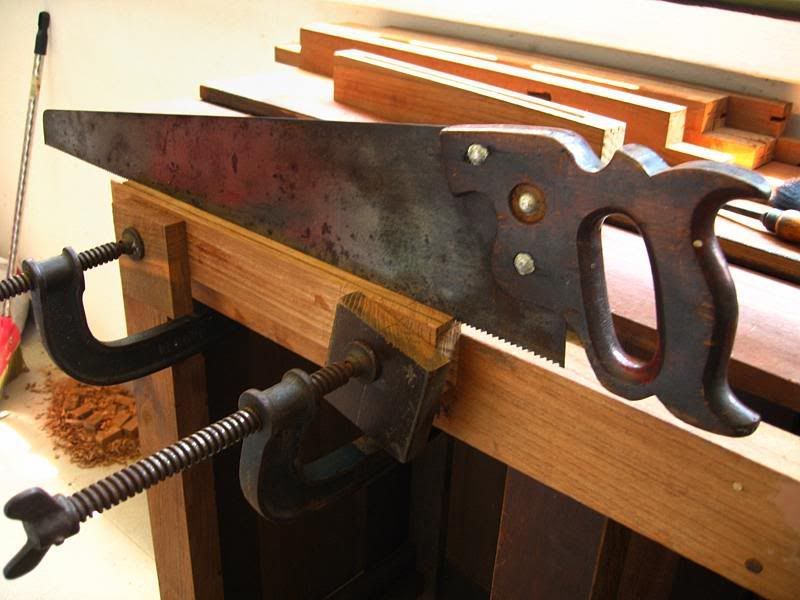
90 deg stanley plane used for the finer work like door frames.
door frames cut and planed waiting for rebate cutting.
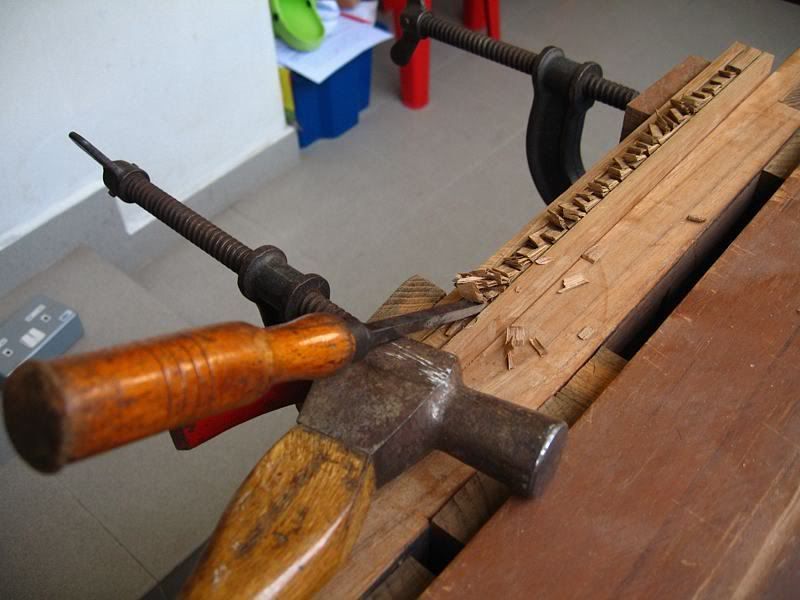
door rebate cutting.
panel rebate cutting.
raw left cabinet door done.
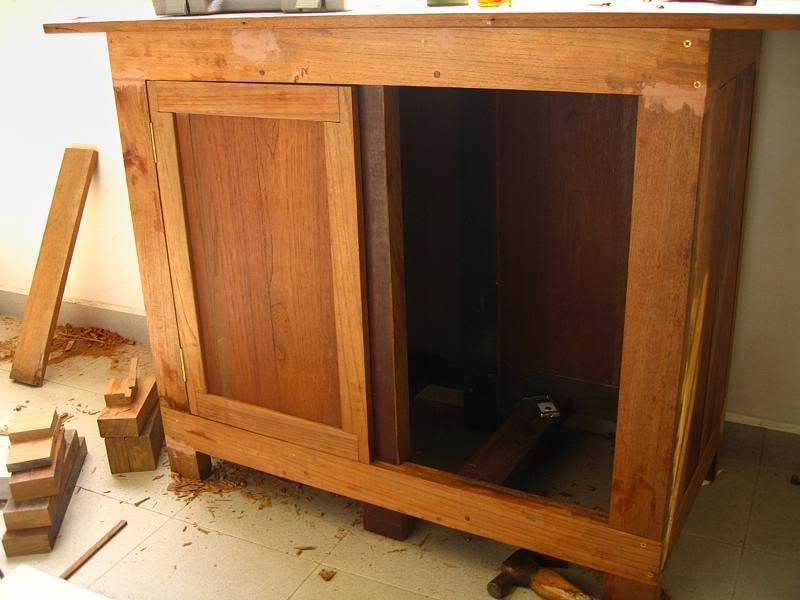
left cabinet door mounted. frame sanded with 120Cw silicon carbide water proof electro coated sand paper.
tank skirting mounted. both doors done. 1st coating of 'rustic touch' melaleuca oil and wood conditioner applied.

This is so cool, making your own cabinet. The end result looks like done by professional. But shouldnt this be in the D.I.Y section?haha.
 My interest has wandered! Do U?


Wah... is your dad a professional carpenter?Any chance to custom build for us also?
Btw where you got your cade tank, i know alot of people being looking.

MISSION ACCOMPLISHED!!! TIME TO LAY BACK AND RELAX!
A Journey Of A Thousand Miles Begins With A Single Step
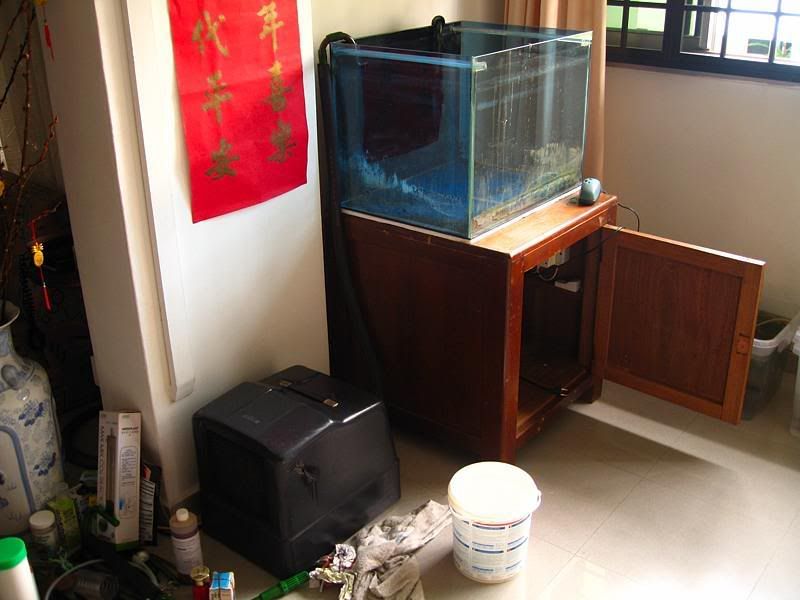
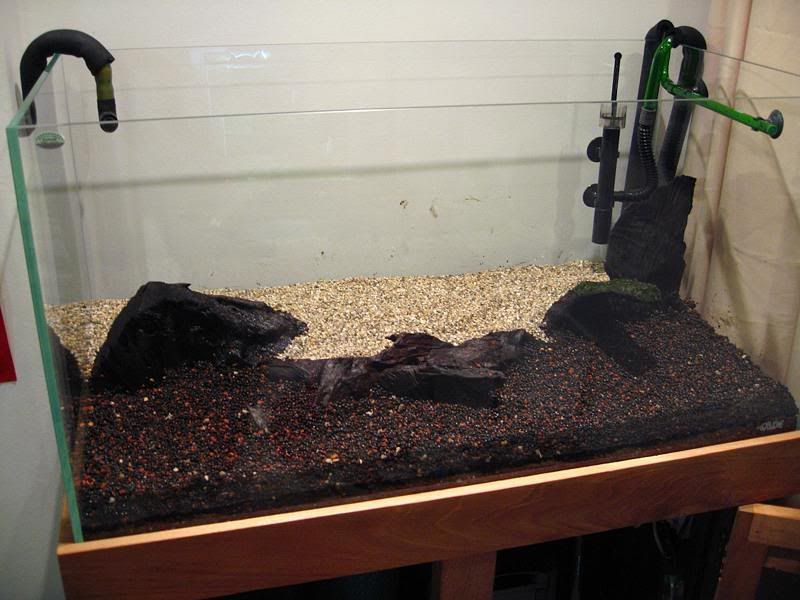
decomm end picture. forgot to take the progress shots.
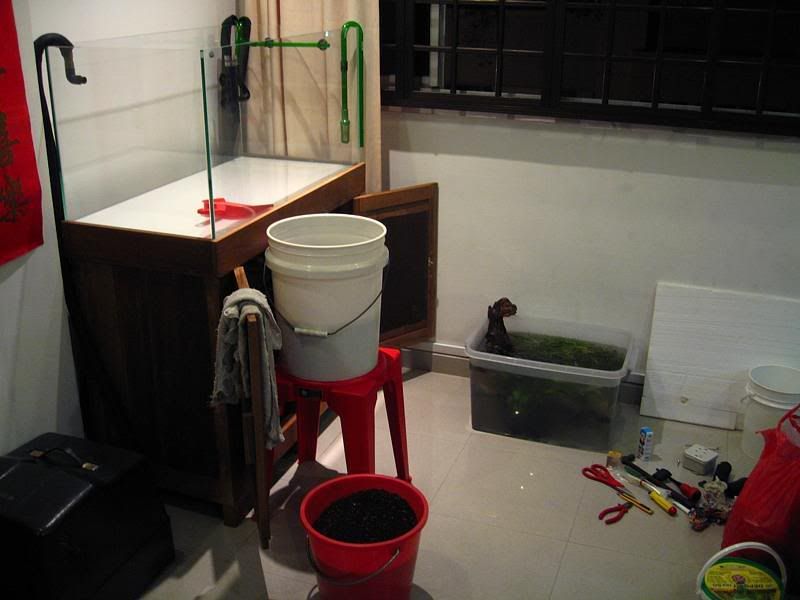
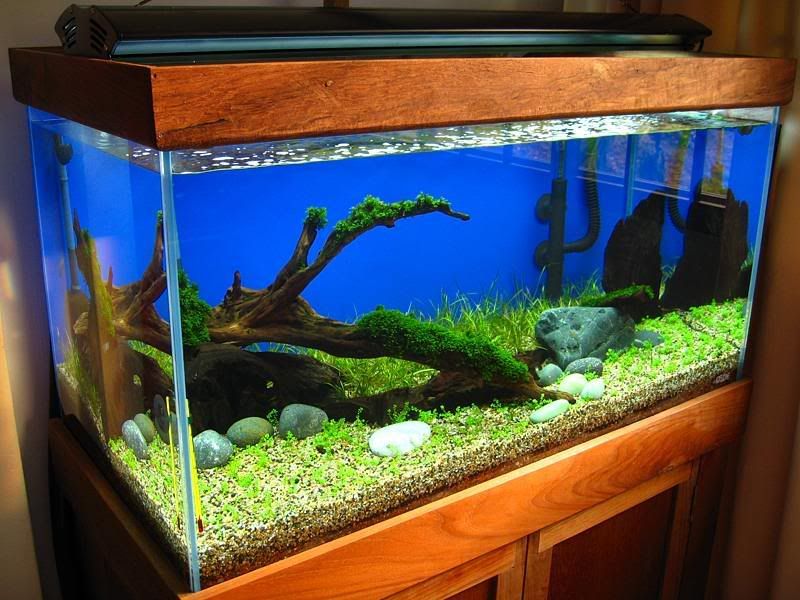
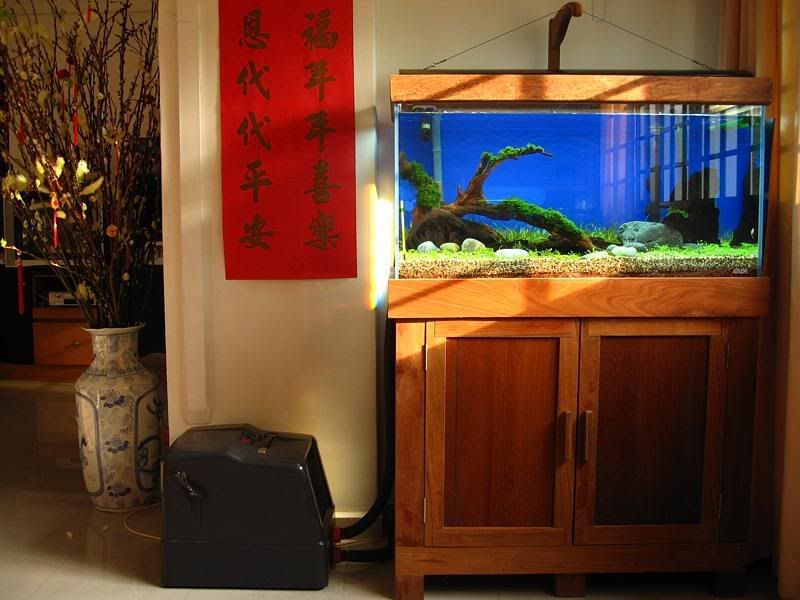
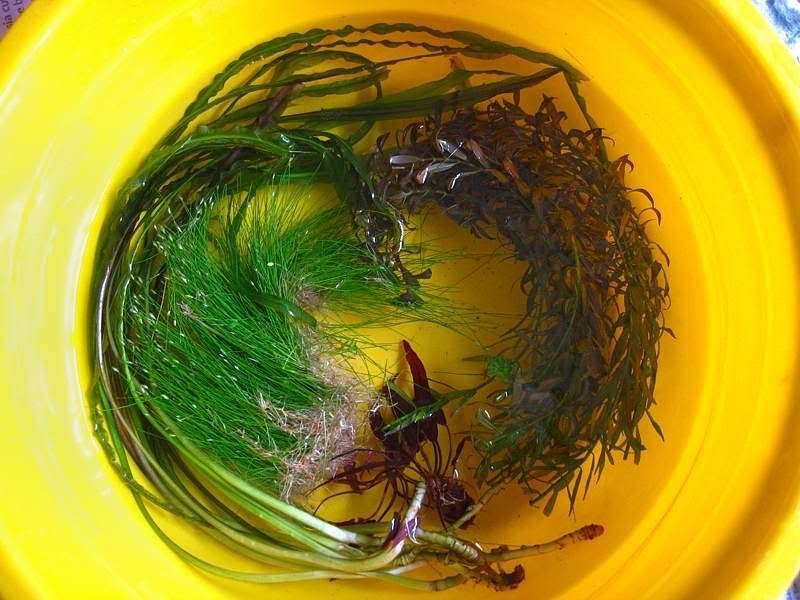
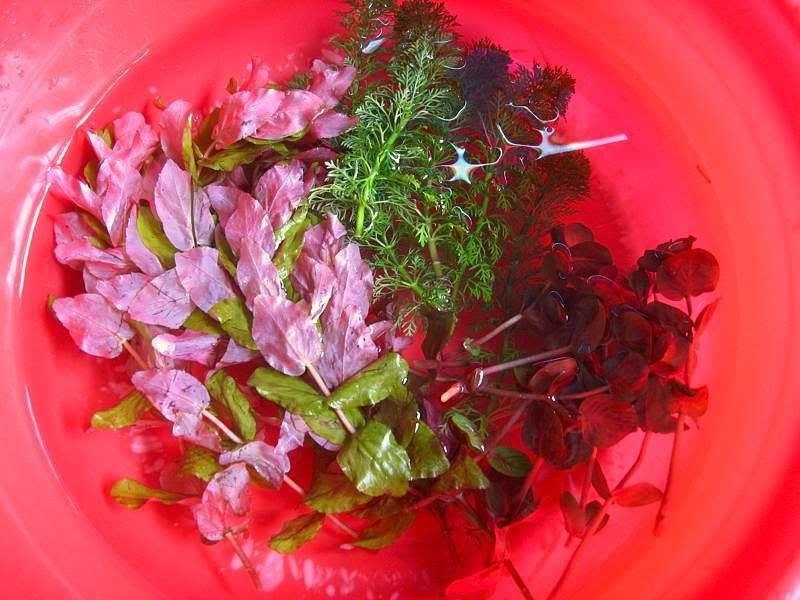
new cabinet and tank in. toyogo tubs housing all plants and water from old tank from which 50% went into new tank.
old aquaclay base with new dennerle fert sprinkled on top.
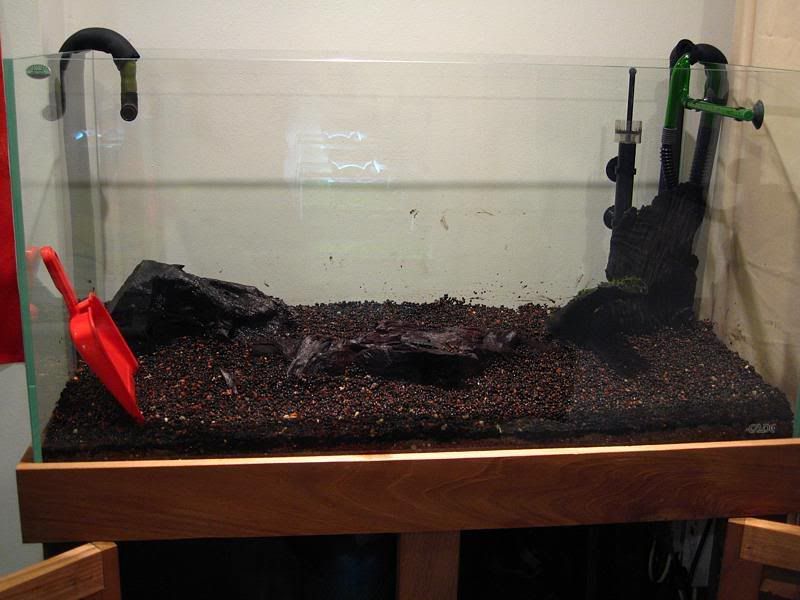
belian wood from kuching sarawak used as dividers and old ada amazonia I topped over.
final layer of new lapis sand over the amazonia I.
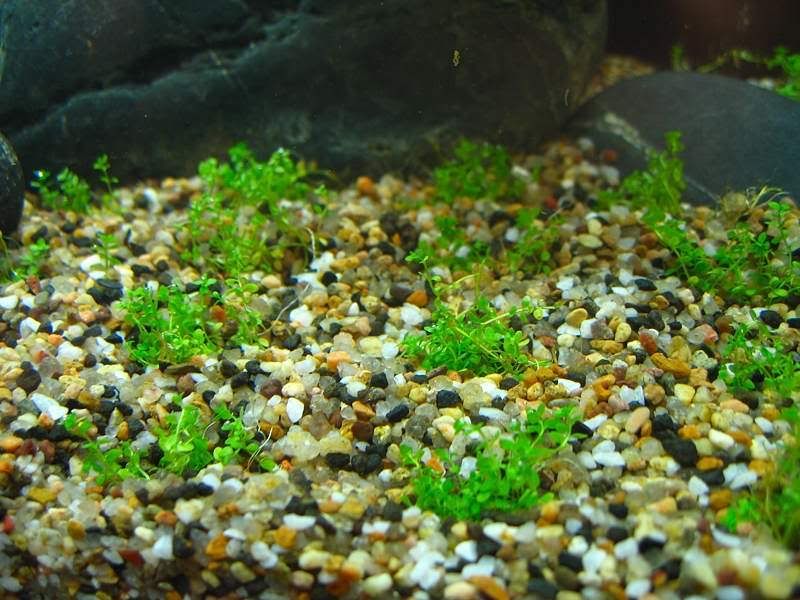
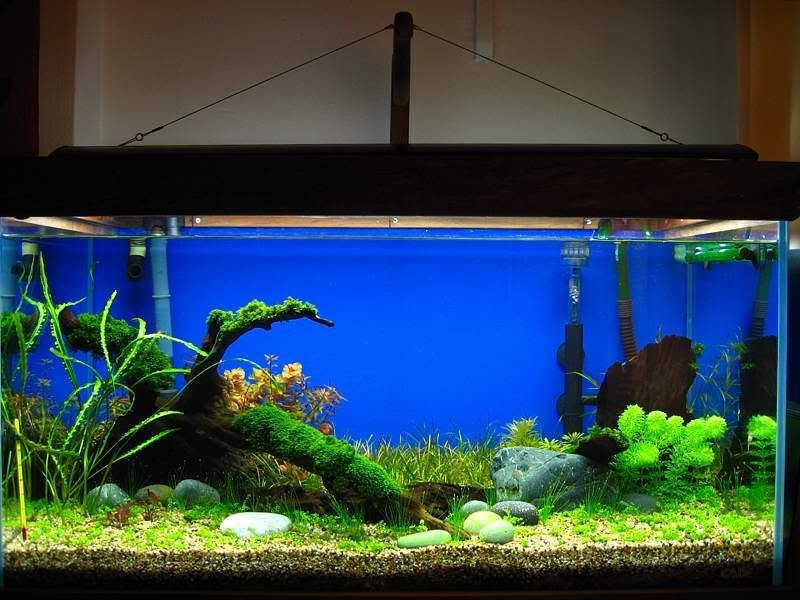
planted tenellus and used old dw with fissiden, topped up the water, installed the T5HO light with 4 tubes 39W eachand hooked up the chiller.....than retired for the night....cny wk already.
oh my god! that is so cool to make your own cabinet! any chance of a full tank shot? Show case your full set!
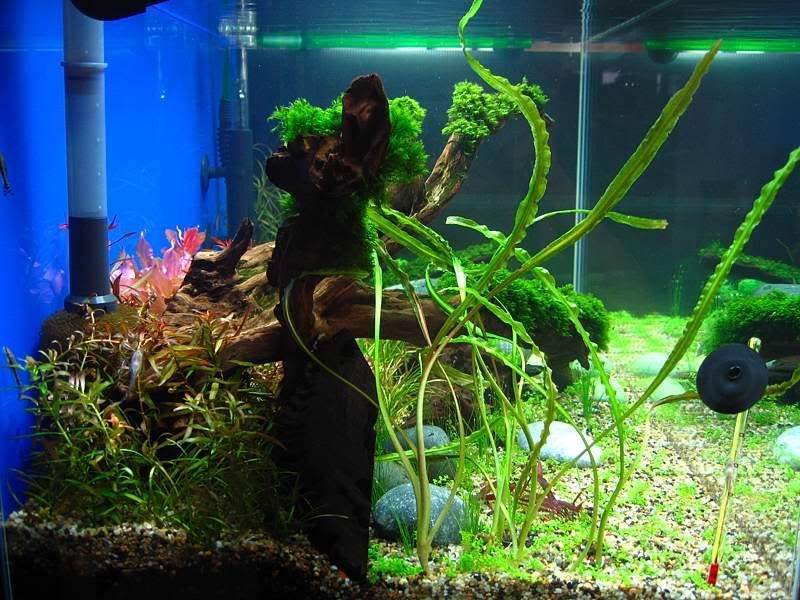
with the 2nd day over.....more planted and scaping to the tank and added something special....one and only one in singapore, batam and west malaysia.....haha.
a proud cade owner....the last of the mohicans...no more cade in singapore.
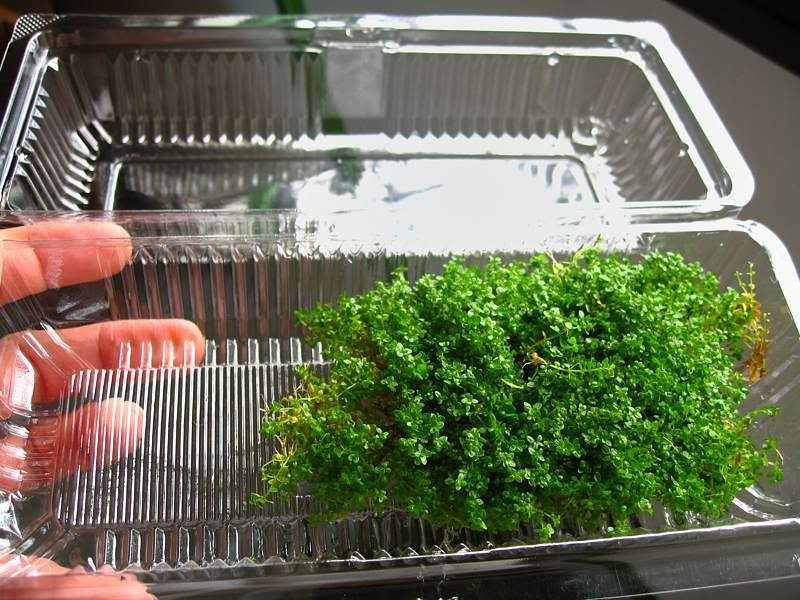
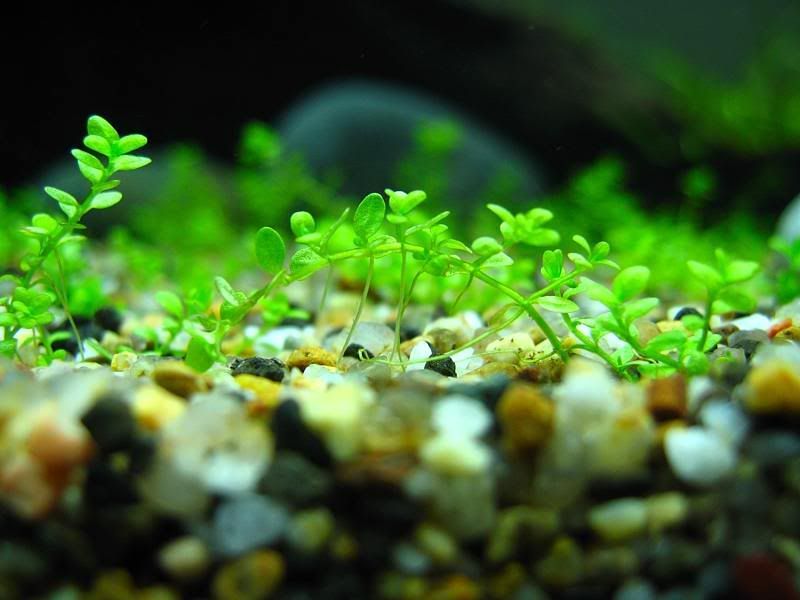
$6 of hc from c328 and planted only half of the amount. over estimated fault.
hc planted in clumps to encourage faster rooting and lessen the chance of melting....haha...my theory....but with cold water...anything lso can lah.
hc planted done!! yeah!!!.
hc started creeping on the same evening!! so far no melting.
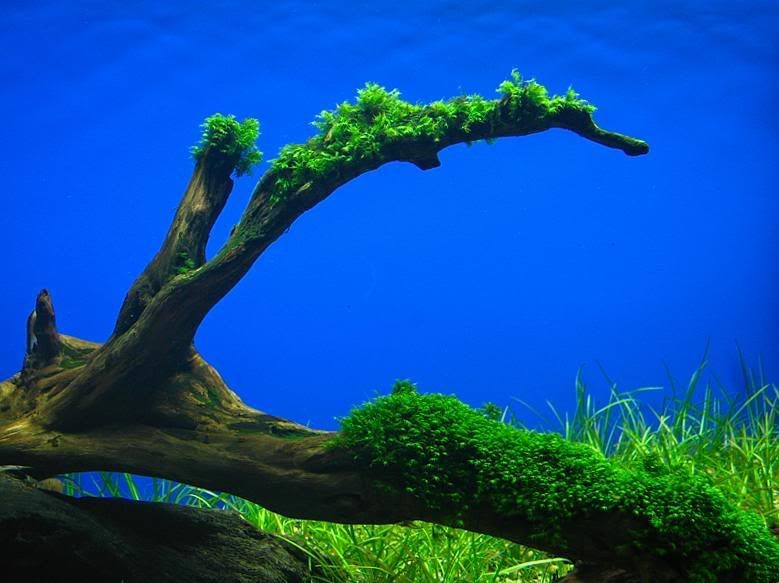
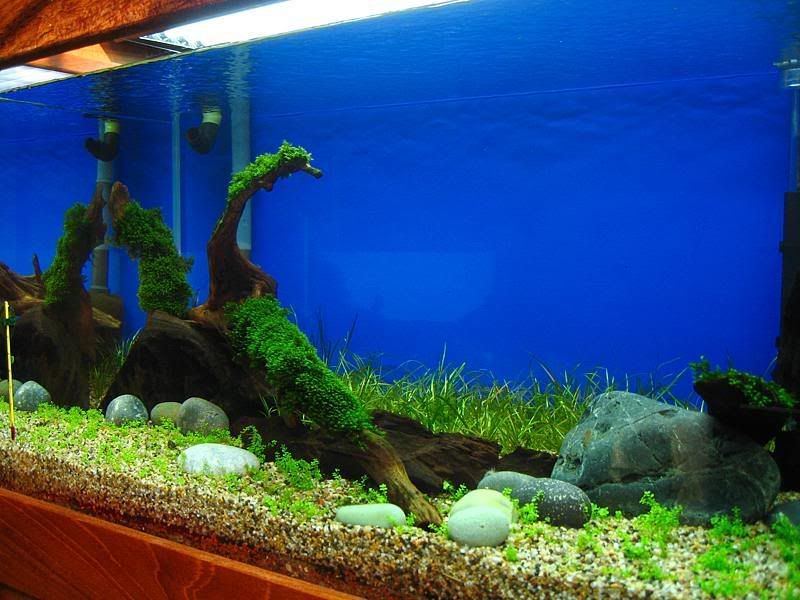
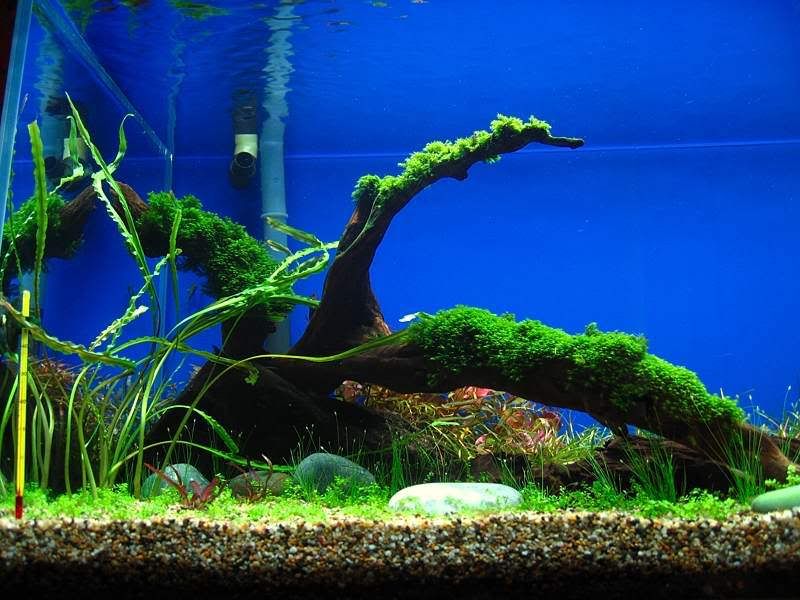
the fissiden arch over the fields.
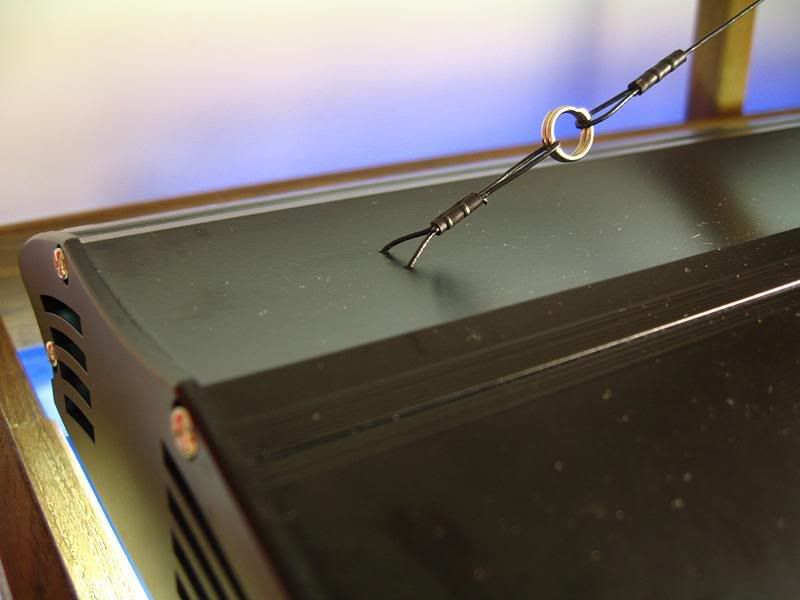
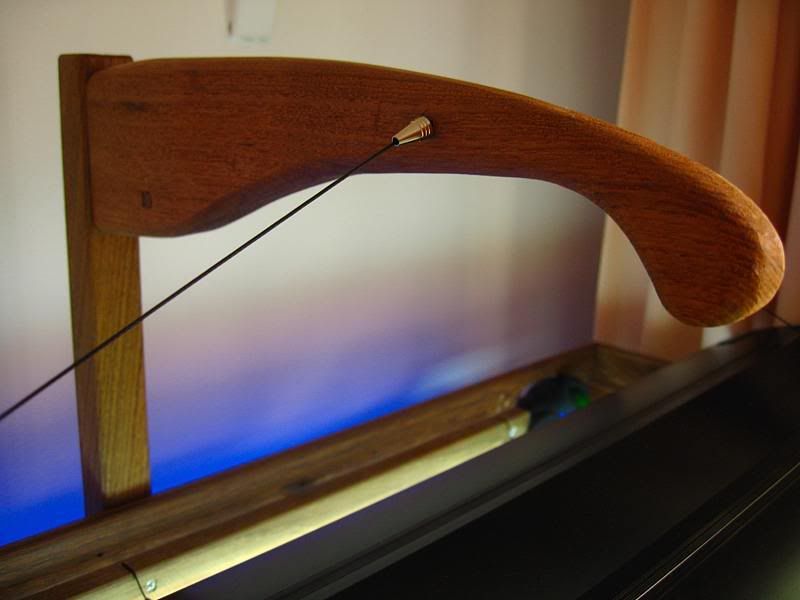
modified T5HO lights with 120lbs silicon stainless steel fishing leader. ends crimped with 8x1mm brass crimps. looped with 8mm dia stainless steel fishing ring. courtesy of my brother.
the special one and only one light suspension system. designed in cad, cut with jig saw, planed and oiled with with rustic touch. steel leader end crimps hidden in redleaf pen head.
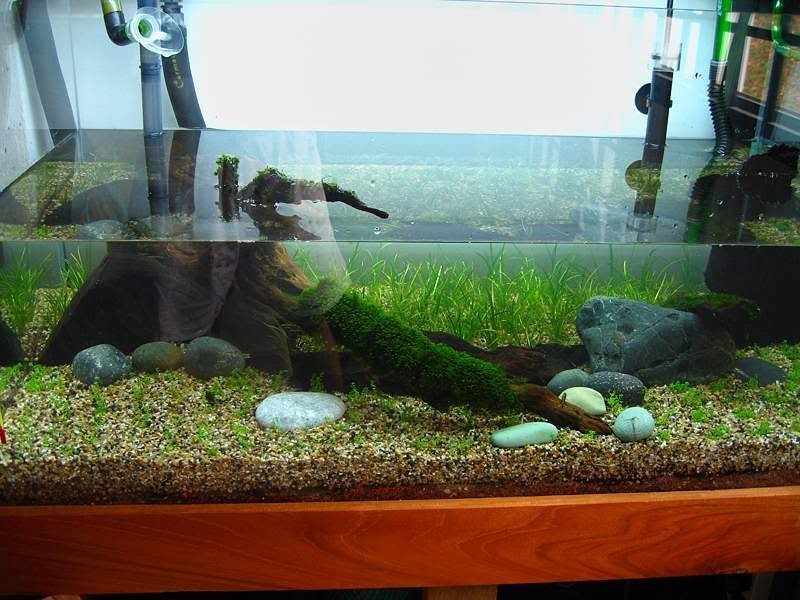
a morning shot by the window.
another shot from the other side.
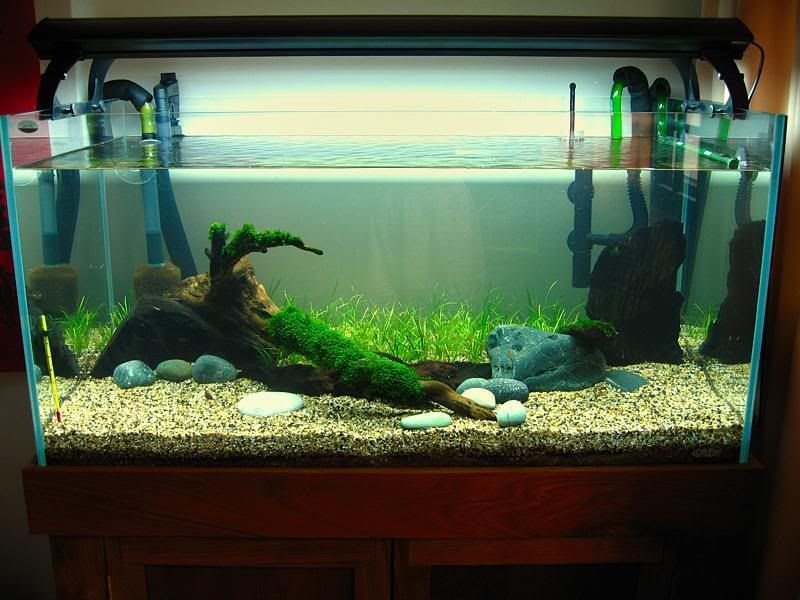
full front shot on cny first week!
on wed added a few plants.
planting done....now for the night pictures!
and finally the full front shot by night. a hanging picture by night.
that's all folks.....will be updating soon. stay tuned.....haha.
hi!
are your tenellus getting a reddish hint? seems like it...
Bro, I like your woody cabinet concept. Very nice.
VIPER
Great work!
Cheers
many thanks. alamak....is there a DIY section?...sorry i didn't know. mods, pls move if deems fit. tq.Originally Posted by sesese

nope, it was his big time hobby. our house furniture, sofa, all cabinets were done by him. haha....any letovers worthy of another fishtank?......hehehe. my cade was from suntec midori, mr chua. was looking for it for many moons too....
thank you yeoyl87....scroll further down, have both morning and night shots.
yah some are getting red. most of them are still green, others are copperish looking. think b coz i lowered the water level to plant the new plants the hc seemed to start melting already.
the one on the far right seems to grow double overnight..literally. super growth man. think it is limnophila sessiliflora. got the dry form, farm uncle at teo's picked it from the planting bed.
thank you viper 007.
very nice journal and diy.
maybe next project is to diy a chiller cabinet that comes with ventilation fans?
Cheers,
Melvin Lim
You should remove the stones cos they are too rounded and don't look very natural. Try planting more crypts near the DW. I can't wait for the tank to mature, it'll definately look very nice.
BTW plse share with us your fert regime from the first day until now cos your tank looks GREAT (and without algae) despite having very few plants at the begining and it's also near the window.
Admiring my Fishes calm the Beast within me
bro your carpentry skill is solid
Wow this is so amazing! reminds of my my secondary school times! hahhaha I can't imagine cutting such hard wood with just hand saw! must be damn tiring, not to mention to keep the saw steady to get a nice neat cut!
Excited to see the progress of this journal!
by the way, where do you get those oils? I need some to condition my chengnai wood plant rack! thanks!

Very well made. Great talent in carpentry. Congratulations! Surely, I will follow the progress of your beautiful tank. Great talent! Keep us updated. Thanks for sharing this to everyone.
wow great carpentry skills....teak wood not easy to work with ...nice workmanship
 Posting Permissions


Bookmarks