You could do away with costly filtration equipments very easily for planted tanks if you follow my example. I use an under gravel filter (UGF) with some changes in its set up. Before you read further clear your head of all prejudices created by reading comments about UGF from people who has not used a UGF like I set up for these have been made by people who have no idea about the possibilities an UGF has.
First I will show you how I set up my UGF you will need PVC pipes, acrylic sheet/fibre glass sheet (or glass if you can hole glass), submersible pumps, stone pebbles/ceramic noodles, filter sand, PVC insect net, some nylon pillow fibre, silicone paste.
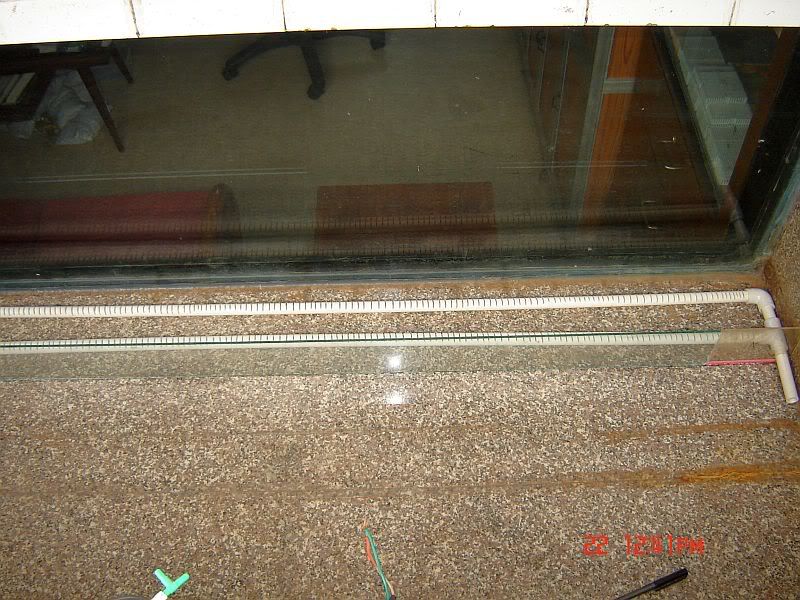
Inspect your aquarium vacuum tube. We will be walling off a portion of the tank bottom to house the UGF and no portion of this should be narrower than your vacuum tube. We need to wall of a portion as this is required to avoid the root system of your plants interfering with the filter. It also follows that this portion will remain un-planted for the same reason. Keeping this portion unplanted is also required as you will need to vacuum the gravel/sand in this portion from time to time. This walled off portion need not be in a particular portion of the tank, I will be demonstrating a UGF which is along the front glass, having it there makes it easier to vacuum. It also makes it easy to set up a uniform in-tank flow from rear to front pushing all the muck forward to be trapped in the UGF and removed by vacuuming.
Because I am demonstrating a foreground UGF does not mean you cannot incorporate the system in your aquascaping. A wavy unplanted path between planted portions using special coloured sand or pebbles can be used as the UGF. What you have to see to in such a UGF is that the materials used should stand your regular vacuuming of this portion. You will also have to ensure that the particles are small enough (about 40 mesh) to do the mechanical filtration. If you are going to use coloured gravel you may have to mix it with 40 mesh filter sand in a proportions that the sand is not visible, that is normally 1portion gravel to 2 portion sand, for smaller than pea size gravel. The sand will become visible immediately after vacuuming but will very soon hide under the gravel. You will also need to pay attention to your in-tank water circulation to avoid dead spots, but that is easily done.
You will have to decide on the total area you need to wall off. This depends upon your flow rates and choice of the type of submersible pump you wish to use. Please remember here that more flow is not always better, you certainly do not need a flow greater than twice the volume of your tank every hour, even half that is good enough even for mechanical filtration. Taking flow reading from the chosen pumps manuals, convert it into Litres per minute (LSM) total flow. Now put this into the formula given below:-
11 x LSM = Area in square inch required for UGF

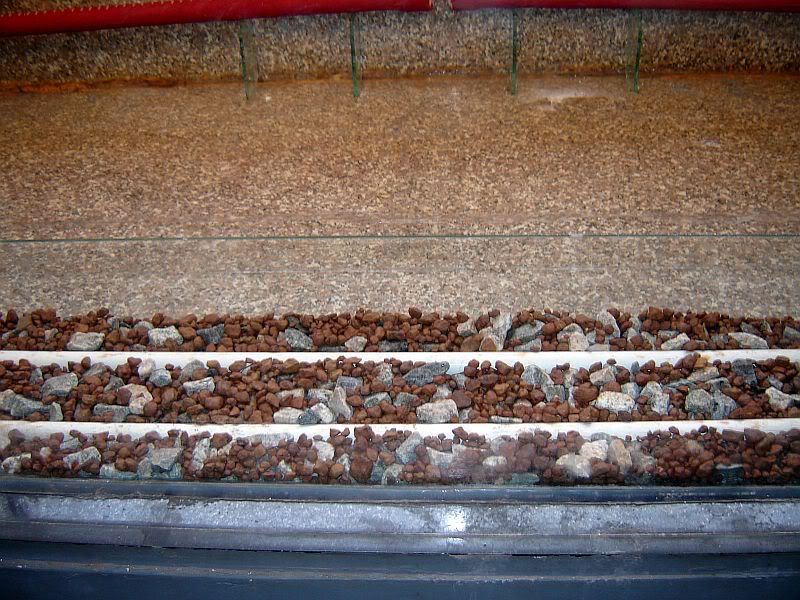
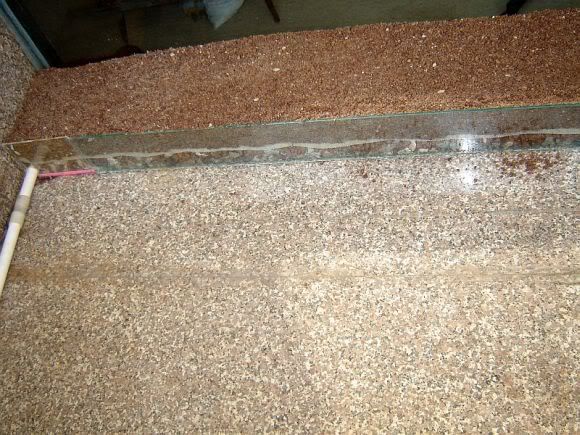
Now using pebbles or ceramic nodules fill the area between the pipes and walls so that you form a platform about the height of the pipes. This is the pure biological filtration area and also the water pool from which the pumps will suck out water. You can see what I have done at this stage using pebbles. This platform is about ¾ inch high.
Now you must cut the PVC insect net to fit snugly in the area wall in. Using silicone paste and/or nylon pillow fibres make sure that filter sand will not be able to sneak into the bottom layer. This is very essential, for otherwise the sand grains will find their way into your pump, even if they do not jam the pump they will eventually reduce the life of the pump by their abrasive action. Now your creation will be looking like this and you are ready for the next stage.

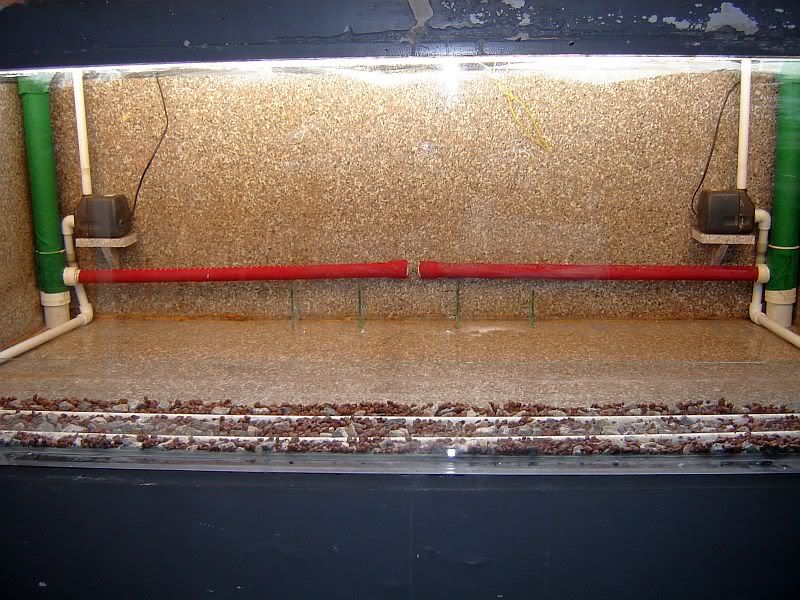
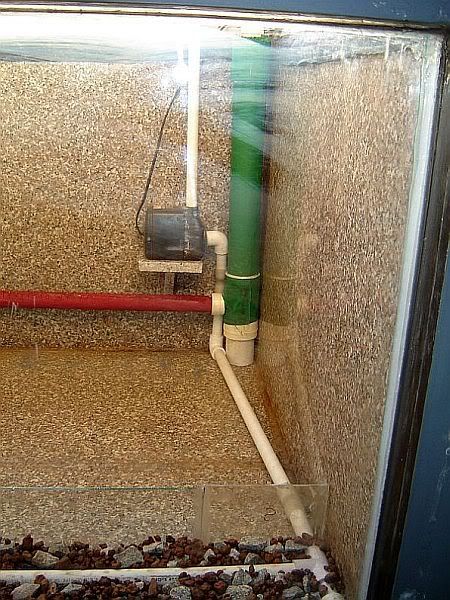
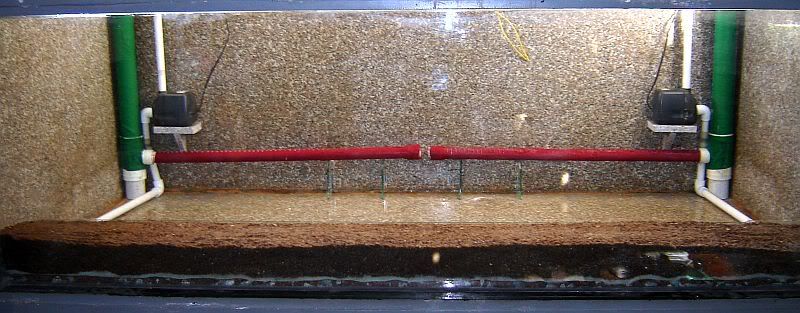
The pipes leading away from your UGF is fitted to the suction side of your pumps at the rear of the tank. These pictures were taken when I was setting up the Incomparable, and here you see the output of the pumps first lead to the top of the CO2 reactors I had built, before escaping from their bottom and through the red spray bar upwards.
Now we fill the filter sand or if you so desire, the sand and gravel mixture into the walled off portion.
Your UGF for the planted tank is now ready for functioning. I set this one up 3 years ago and it is still functioning perfectly. My water is clear. The bottom remains muck free. It collect all the finer debris and holds them for me to vacuum at water change time. I dont need to vacuum any other portion of the tank


 Posting Permissions


 Reply With Quote
Bookmarks